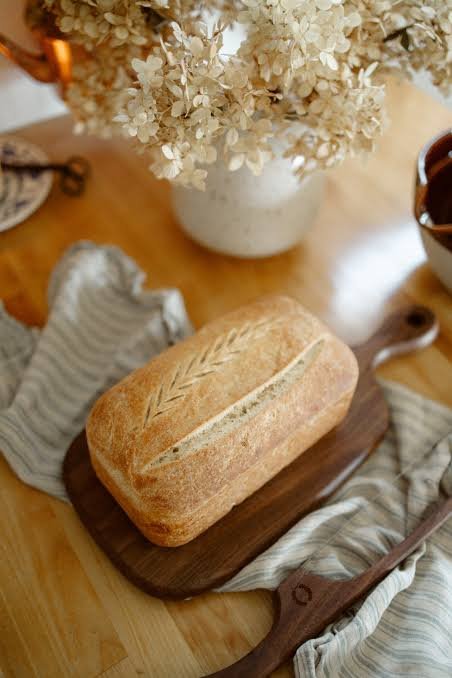
Sourdough sandwich bread is one of the most rewarding foods you can make in your own kitchen using simple everyday ingredients. This article brings you a soft, tender, and incredibly delicious bread recipe that combines the classic tangy flavor of natural fermentation with the light texture of traditional sliced bread. Unlike artisanal loaves that have a very hard crust and giant air holes, this sandwich loaf is baked in a standard bread pan so every slice comes out uniform, easy to hold, and perfect for your daily meals. The process relies on a active sourdough starter, warm water, high quality flour, a touch of honey, and a splash of healthy oil or melted butter to create a tender crumb. Baking your own loaf at home gives you full control over what goes into your food, eliminating processed additives, preservatives, and unnecessary sugars. It is an approachable method designed for home bakers of any skill level who want to enjoy nutritious homemade bread every week.
People around the world are completely in love with sourdough sandwich bread because it brings back the cozy feeling of traditional home cooking while offering amazing flavor. The unique fermentation process gives the loaf a mild, savory tang that makes plain store bought bread seem boring by comparison. Families love it because the crust stays gentle on the roof of your mouth, making it wonderful for kids and older adults who prefer soft slices. It holds up remarkably well when you spread heavy ingredients like peanut butter, sliced meats, thick cheeses, or juicy tomatoes without tearing apart or getting soggy. Every slice toasts to a beautiful golden brown while staying soft and pillowy on the inside, creating an irresistible contrast in texture. People also love the pure pride that comes with taking basic flour and water and transforming them into a tall, gorgeous loaf that fills the entire house with an incredible bakery aroma.
Making sourdough sandwich bread is a wonderful habit to start whether you are driven by warm emotions, delicious food cravings, or a goal to eat healthier. From an emotional view, kneading dough and watching it slowly rise brings a quiet sense of calm and mindfulness to a busy workweek. It becomes a special weekend ritual that helps you slow down, disconnect from screens, and craft something nourishing for the people you care about most. From a fitness perspective, natural sourdough fermentation breaks down complex gluten structures and phytic acid, making the bread much easier on your stomach and improving nutrient absorption. It provides steady energy without causing sharp blood sugar spikes, making it an excellent fuel choice for active lifestyles. Whether you want to prepare healthy school lunches, enjoy a comforting grilled cheese on a rainy afternoon, or upgrade your morning breakfast toast, this recipe meets all your needs effortlessly.
Learning the art of baking this loaf will permanently transform how you look at daily meals and simple whole foods. You will no longer need to buy plastic wrapped loaves that spoil quickly or contain hidden chemicals to stay soft on store shelves. Once you master the simple steps of mixing, fermenting, shaping, and baking, you can easily fit this routine into your weekly schedule with minimal active effort. The actual hands on work takes only a short amount of time, while the natural yeast does all the heavy lifting in the background while you sleep or work. The final result is a versatile, nourishing food that brings warmth, health, and unmatched flavor to your dinner table every single day.
Ingredients You Will Need
To make one full size loaf of sourdough sandwich bread, gather the following ingredients in your kitchen:
- 150 grams active sourdough starter fed and bubbly
- 350 grams warm water around 80 degrees Fahrenheit
- 500 grams bread flour or high protein unbleached all purpose flour
- 20 grams raw honey or pure maple syrup
- 25 grams olive oil or melted unsalted butter
- 10 grams fine sea salt or kosher salt
- 1 tablespoon extra oil or butter for coating the baking pan
Step by Step Method
Step 1 Feed Your Sourdough Starter
Before you begin making your bread dough, ensure your sourdough starter is fully active and energetic. Feed your starter about four to six hours before you plan to mix the main ingredients. Keep it in a warm location until it doubles in size, shows plenty of bubbles on the sides, and smells light, fruity, and fresh. A strong starter is the secret to getting a good rise without adding commercial yeast.
Step 2 Mix the Liquid Ingredients
In a large mixing bowl, measure out the warm water. Add your active sourdough starter directly into the water. Use a wooden spoon or a dough whisk to stir the mixture until the starter dissolves completely and the liquid looks milky. Pour in the honey and the olive oil or melted butter. Mix everything gently until the liquid ingredients are fully combined and smooth.
Step 3 Add Flour and Salt
Pour the bread flour and the fine sea salt into the bowl with your liquid mixture. Stir with a sturdy spoon until a shaggy dough begins to form and no dry pockets of flour remain visible. If the dough seems a bit sticky, that is completely normal at this stage. Cover the bowl with a clean kitchen towel or a reusable bowl cover and let it rest for thirty minutes. This rest period allows the flour to absorb the water properly.
Step 4 Knead the Dough
After thirty minutes, remove the cover from your bowl. You can knead the dough by hand on a lightly oiled surface for about six to eight minutes until it becomes smooth, elastic, and soft. Alternatively, place the dough in a stand mixer fitted with a dough hook attachment and mix on low speed for six minutes. The dough should feel supple and hold a round ball shape without sticking excessively to your hands.
Step 5 First Fermentation Bulk Rise
Shape the dough into a smooth ball and place it back into a lightly oiled bowl. Cover the bowl tightly with plastic wrap or a wet cloth to prevent the surface from drying out. Leave the dough in a warm area of your kitchen to ferment for six to eight hours. During this period, the sourdough yeast will consume the natural sugars in the flour. The dough is ready for the next step when it has increased in size by about fifty percent and feels light and puffy when gently touched.
Step 6 Shape the Sandwich Loaf
Gently turn the fermented dough out onto a clean, lightly floured work surface. Press down softly with your fingers to flatten the dough into an oblong rectangle shape, expelling large air bubbles. Fold the top third of the rectangle down toward the center, then fold the bottom third up like a business letter. Roll the dough up tightly into a firm log shape. Pinch the side seams and bottom seam securely closed so the loaf keeps its tight shape while rising.
Step 7 Prepare the Loaf Pan and Final Rise
Lightly grease a standard nine inch by five inch bread loaf pan with extra butter or oil. Place your shaped dough log seam side down into the greased pan. Cover the loaf pan loosely with a clean towel. Allow the dough to rise in a warm spot for another three to five hours. The dough should slowly expand until it reaches about one inch above the rim of the pan and looks rounded on top.
Step 8 Preheat Your Oven
When your loaf is nearly done rising, preheat your oven to 375 degrees Fahrenheit. Make sure the oven rack is positioned in the center position so the heat distributes evenly around the bread pan. Allowing your oven to heat thoroughly for at least twenty minutes ensures a steady baking temperature from start to finish.
Step 9 Bake the Sandwich Loaf
Place the bread pan into the preheated oven. Bake at 375 degrees Fahrenheit for thirty five to forty minutes. The top of the loaf should turn a rich golden brown color, and the sides should pull away slightly from the edges of the pan. If you tap the top crust gently, it should sound hollow inside. If the top gets dark too quickly during baking, lay a small sheet of aluminum foil loosely over the top for the last ten minutes.
Step 10 Cool and Slice
Remove the loaf pan safely from the oven using thick oven mitts. Let the bread sit in the pan for ten minutes to soften slightly. Carefully turn the pan over and slide the hot bread out onto a wire cooling rack. Allow the loaf to cool completely to room temperature for at least two hours before slicing. Slicing too early while the bread is hot can cause the inside crumb to become gummy, so patience is key.
Why This Recipe Is Special
This sourdough sandwich bread recipe stands out because it perfectly bridges the gap between old world natural baking and modern practical living. Standard artisan sourdough yields a very firm, crunchy crust that can sometimes be difficult to chew, whereas this recipe incorporates mild fat from olive oil or butter to achieve a dreamy, velvety slice. The addition of a touch of raw honey balances the sour note of the starter, resulting in a gentle flavor profile that works for every member of your household, including young children.
From a health standpoint, this loaf is vastly superior to commercial white or wheat bread found in local grocery stores. Long fermentation naturally neutralizes antinutrients like phytic acid, which allows your body to absorb minerals like magnesium, iron, and zinc much more efficiently. Additionally, the beneficial lactic acid bacteria break down complex starches and gluten proteins, making this bread far gentler on the digestive tract for people who experience mild sensitivity to standard processed grains. It contains zero artificial preservatives, zero high fructose corn syrup, and zero chemical softeners.
The overall taste experience is cozy, deep, and satisfying. Every slice offers a soft texture that holds together well during butter spreading while keeping a pleasant chew. The natural rise produces a fine, uniform structure inside the loaf, ensuring that mayonnaise, jams, mustard, or egg yolks do not drip through giant holes onto your hands while you eat.
Extra Tips for Better Taste
To take your homemade sandwich bread to an even higher level, try experimenting with small adjustments to customize your loaf. Brush the top of the unbaked loaf with a tiny bit of fresh milk or melted butter right before placing it into the oven. This creates an extra soft, shiny, golden crust that looks like it came from a professional French bakery.
You can also sprinkle whole seeds on top of the loaf for added crunch, visual appeal, and extra nutrition. Sesame seeds, flax seeds, rolled oats, or sunflower seeds stick wonderfully to the dough if you lightly spray the top with water before adding them. The seeds toast gently during the baking process, releasing rich nutty aromas and enhancing the total flavor of your morning toast.
If you prefer an even milder flavor with almost no sour taste, reduce the bulk fermentation time slightly by keeping your dough in a warm place or using a very young, recently fed starter. Conversely, if you prefer a sharper sourdough punch, place the shaped dough inside its pan into the refrigerator overnight for a cold final rise. The cold temperature slows down the yeast while allowing the lactic acid bacteria to keep producing complex tangy flavors.
Finally, consider replacing up to twenty percent of the white bread flour with fresh whole wheat flour or rye flour. This simple swap adds a deep, earthy note and extra dietary fiber without compromising the soft, pillowy texture that makes this sandwich loaf so special for daily use.
Final Thoughts
Baking a fresh loaf of sourdough sandwich bread at home is one of the most practical and delightful culinary skills you can master. It transforms basic household ingredients into a wholesome, flavorful staple that nourishes your whole family with clean, natural energy. Once you cut into your first warm, golden, perfectly shaped loaf, you will realize how easy and satisfying true home baking can be. Enjoy the peaceful process, share your slices with loved ones, and embrace the comforting joy of freshly baked bread in your daily routine.
Nutrition Details
Below is the approximate nutritional breakdown for the full recipe loaf and for individual slices based on a yield of twelve equal slices per loaf.
| Nutrients | Entire Loaf | Per Slice (1 of 12) |
| Calories | 2150 kcal | 179 kcal |
| Carbohydrates | 410 g | 34.1 g |
| Protein | 62 g | 5.2 g |
| Fat | 28 g | 2.3 g |
| Saturated Fat | 4 g | 0.3 g |
| Fiber | 16 g | 1.3 g |
| Sugar | 18 g | 1.5 g |
| Sodium | 3900 mg | 325 mg |
| Potassium | 520 mg | 43 mg |
Disclaimer
This recipe and the accompanying health information are provided strictly for educational and instructional purposes. Everyone has a unique body, different metabolic needs, and distinct digestive responses. While natural sourdough fermentation reduces gluten levels and improves overall digestibility, this bread still contains natural wheat gluten and is not suitable for individuals diagnosed with celiac disease or severe wheat allergies. Nutritional values provided in the table above are estimates calculated using standard ingredient databases and may vary based on specific brands, exact measurements, and individual baking conditions in your home kitchen.