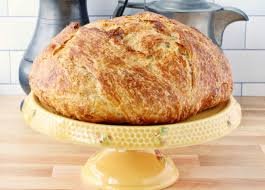
Sourdough croissants are a wonderful combination of ancient bread making and traditional French pastry craft. When you make these homemade pastries, you are taking active sourdough starter and combining it with pure flour, water, milk, sugar, salt, and rich butter. Instead of using fast commercial yeast, this natural recipe relies on wild yeasts and friendly bacteria to raise the dough slowly over time. This long fermentation process breaks down complex starches and gluten, making the final pastry much easier for your body to digest while creating a gentle sour flavor. The process of layering cold butter inside the soft dough creates dozens of ultra thin paper layers that puff up high in the hot oven. The outside becomes golden brown and crispy while the inside stays light, soft, and tender with a lovely honeycomb structure inside.
People all over the world fall deeply in love with sourdough croissants because they offer a totally unique sensory experience that store bought pastries cannot match. The aroma that fills your entire home while these treats bake in the oven is warm, buttery, and comforting beyond words. Every single bite delivers an amazing contrast between the flaky outer crust and the soft, airy interior that practically melts on your tongue. Bakers also love the rewarding feeling of turning simple everyday kitchen ingredients into something that looks and tastes like it came from a high end bakery in Paris. The gentle tangy flavor of the sourdough balances the heavy sweetness of the real butter, so the pastry tastes rich without feeling overly heavy or greasy on your stomach.
Making these amazing pastries at home is an emotional journey that brings immense joy, peace, and satisfaction to your weekend routine. It is the absolute perfect baking project for slow Sunday mornings, festive holiday breakfasts, or special family celebrations when you want to show your loved ones extra care and affection. From a health and fitness view, using wild sourdough starter is far gentler on your digestive system compared to heavy commercial baked goods. The slow natural fermentation process helps lower the ph level of the dough, which neutralizes phytic acid and allows your body to absorb minerals much better. Eating a fresh homemade pastry made with natural ingredients gives your mind true happiness and gives your body pure clean energy without weird artificial preservatives.
Starting this baking project is a fantastic way to slow down your busy modern life and practice mindful kitchen craft. The method requires patience, gentle hands, and a bit of focus, which makes it a very peaceful activity to clear your mind after a long week of work. Sharing a warm, freshly baked pastry with a steaming cup of coffee or hot tea creates unforgettable memories with family and friends around your kitchen table. Once you master the simple folding techniques, you will feel a huge sense of pride whenever you see those beautiful golden layers rising in your oven. This recipe turns basic home baking into a delicious form of self care that nourishes both your body and your heart in the most delightful way possible.
Ingredients You Will Need
For the Active Sourdough Starter
-
100 grams active sourdough starter, fully bubbly and fed 4 to 6 hours before baking
-
50 grams warm water, around 25 degrees Celsius
-
50 grams unbleached bread flour
For the Main Dough
-
500 grams high protein bread flour, unbleached
-
140 grams whole milk, cold from the refrigerator
-
140 grams pure water, cold from the refrigerator
-
60 grams granulated white sugar
-
10 grams fine sea salt
-
50 grams unsalted butter, softened at room temperature
For the Butter Block
-
250 grams high quality European style unsalted butter, cold with at least 82 percent butterfat
For the Egg Wash
-
1 large egg, beaten well
-
1 tablespoon whole milk or heavy cream
-
1 pinch fine sea salt
Step by Step Method
Phase 1 Prepare the Dough
-
In a large mixing bowl, combine the cold milk, cold water, granulated white sugar, fine sea salt, and your active bubbly sourdough starter. Stir everything together using a wooden spoon or whisk until the sugar dissolves and the liquid looks smooth.
-
Add the high protein bread flour to the wet mixture. Use your hands or a sturdy spatula to mix the ingredients together until a rough, shaggy dough forms and no dry flour remains at the bottom of the bowl.
-
Add the 50 grams of softened unsalted butter to the dough. Knead the dough inside the bowl or on a clean kitchen counter for about 8 to 10 minutes until it becomes smooth, elastic, and slightly firm.
-
Form the dough into a smooth ball and flatten it into a neat rectangular disk. Wrap the disk tightly in plastic wrap to prevent it from drying out.
-
Place the wrapped dough inside your refrigerator to chill for at least 4 hours, or overnight for the best natural flavor development.
Phase 2 Create the Butter Block
-
Take a sheet of parchment paper and fold it to draw a neat rectangle that measures 20 centimeters by 20 centimeters. Unfold the paper so the lines are clear.
-
Cut your 250 grams of cold European butter into thick slices and place them side by side inside the marked square on the parchment paper.
-
Fold the parchment paper edges over the butter to enclose it completely inside the square envelope.
-
Use a heavy rolling pin to tap and roll the butter evenly until it fills the entire 20 centimeter square envelope. The butter block should be smooth, flat, and uniform in thickness.
-
Place the butter block into the refrigerator for 30 minutes so it stays cold but remains pliable and bendable.
Phase 3 Laminate the Layers
-
Remove the chilled dough disk from the refrigerator. Dust your work surface lightly with bread flour. Roll the dough into a rectangle measuring 20 centimeters wide and 40 centimeters long.
-
Take the cold butter block out of the parchment paper envelope and place it directly in the center of your long dough rectangle.
-
Fold the top flap of dough down over half of the butter block. Fold the bottom flap of dough up over the other half of the butter block so the two dough edges meet neatly in the exact middle. Pinch the center seam and the side edges closed with your fingers to seal the butter completely inside.
-
Turn the dough 90 degrees on your counter so the middle seam runs vertically from top to bottom like a book spine.
-
Gently tap the dough with your rolling pin to spread the butter inside without tearing the dough. Roll the dough out lengthwise into a long rectangle about 60 centimeters long and 20 centimeters wide.
-
Perform a single letter fold by taking the bottom one third of the dough and folding it up toward the center. Then fold the top one third of the dough down over the top, making a neat three layer block.
-
Wrap the dough block tightly in plastic wrap and chill it in the refrigerator for 45 minutes to let the gluten relax and keep the butter cold.
-
Repeat the rolling and single letter fold process two more times, chilling the dough for 45 minutes between each fold. You will perform three single letter folds in total to create many thin alternating layers of dough and butter.
-
After the third fold, wrap the dough well and chill it in the refrigerator overnight, or for at least 8 hours.
Phase 4 Shape and Proof
-
Line two large baking sheets with parchment paper and set them aside for later.
-
Lightly dust your work surface with flour. Remove the cold dough from the refrigerator and roll it out smoothly into a large, long rectangle measuring about 25 centimeters wide by 60 centimeters long and about 4 millimeters thick.
-
Trim the rough outer edges using a sharp pizza cutter or chef knife to expose the delicate inner layers.
-
Mark the top edge of the dough every 10 centimeters. Mark the bottom edge of the dough every 10 centimeters, but offset the marks by 5 centimeters so you can cut tall, sharp triangles.
-
Cut the dough into long triangles using your pizza cutter or knife.
-
Take one triangle and make a small 1 centimeter vertical slit in the middle of the wide base. Gently stretch the triangle slightly in length. Roll the base tightly up toward the thin pointed tip, keeping the center point neat.
-
Place the shaped pastry on your prepared baking sheet with the pointed tip tucked underneath so it does not unfold while baking. Repeat this shaping process for all remaining triangles, leaving plenty of space between each item on the tray.
-
Cover the baking sheets loosely with plastic wrap or a large food safe box to hold in moisture.
-
Let the shaped pastries proof at room temperature, ideally around 22 to 24 degrees Celsius, for 8 to 12 hours until they puff up significantly, wobble when you gently shake the pan, and show clear visible layers on the sides.
Phase 5 Bake to Perfection
-
Preheat your home oven to 200 degrees Celsius for at least 30 minutes before baking.
-
In a small bowl, whisk together the large egg, 1 tablespoon of milk, and a tiny pinch of salt to make the egg wash.
-
Gently brush the top surfaces of the proofed pastries with the egg wash using a soft pastry brush, being very careful not to let the liquid drip down the sides because that can glue the layers together.
-
Place the baking sheet into the middle rack of your hot oven. Immediately lower the baking temperature to 190 degrees Celsius.
-
Bake for 20 to 22 minutes until the pastries turn a deep golden brown color on top and feel light when lifted gently with a spatula.
-
Remove the baking sheet from the oven and transfer the hot pastries onto a wire cooling rack. Allow them to cool completely for at least 45 minutes before eating so the buttery internal structure sets properly.
Why This Recipe Is Special
This unique recipe stands out because it blends traditional French pastry baking with natural sourdough fermentation. Commercial yeast recipes push dough to rise very fast, which can sometimes leave you feeling bloated or full of gas. Natural sourdough fermentation works slowly, breaking down complex carbohydrates and hard to digest gluten proteins into simple units that your stomach handles with complete ease. The wild lactic acid bacteria present in your active starter produce gentle organic acids that give these pastries an amazing depth of flavor that commercial products simply cannot recreate. Every single bite offers a perfect balance of buttery richness and subtle tangy notes that keep your taste buds excited.
Another fantastic aspect of this recipe is the incredible texture achieved through proper butter lamination. When you bake the pastry, the water content inside the thin butter layers turns into pure steam. This expanding steam pushes the delicate dough layers apart, creating hundreds of tiny air pockets that expand into a breathtaking honeycomb interior structure. The outer skin turns crispy, flaky, and beautifully golden brown while the inside remains amazingly soft and moist. You get professional bakery quality right inside your home kitchen using simple, wholesome ingredients without any commercial additives, artificial flavorings, or chemical dough conditioners.
From a health view, using high quality pure butter and simple unbleached flour makes this treat much cleaner than factory made store pastries that rely on hydrogenated oils and heavy preservatives. The long fermentation process neutralizes phytic acid naturally found in grains, which helps your body absorb important minerals like iron, zinc, and magnesium far more efficiently. Enjoying a real homemade sourdough pastry provides genuine satisfaction that fills both your soul and your appetite, meaning you feel completely happy and content with a single serving rather than needing to overindulge.
Extra Tips for Better Taste
To make your sourdough pastries taste even more incredible, pay close attention to the temperature of your kitchen and ingredients. Butter management is the absolute key to success in this recipe. If your butter gets too warm during the rolling process, it will melt directly into the dough, causing you to lose those distinct flaky layers. If your butter is too cold, it will snap and shatter into hard pieces inside the dough, leading to uneven pockets. Keep your kitchen cool, and if you ever feel the butter softening too much, quickly slide the dough into the refrigerator for 15 minutes to firm everything back up.
You can also experiment with incredible fillings to elevate the flavor profile of your fresh baked treats. Try placing two sticks of dark chocolate along the wide base of each dough triangle before rolling it up to create rich chocolate pastries. For a savory twist, place a slice of smoked ham and a sprinkle of sharp Gruyere cheese inside the dough before shaping. Brushing the tops with a light sugar syrup as soon as they come out of the hot oven adds a gorgeous glossy shine and a hint of extra sweet crunch to the outer crust.
Using top quality European style butter with an 82 percent butterfat content or higher makes a huge difference in flavor and texture. Lower quality American style butter contains more water, which creates too much steam and can make the dough soggy or heavy. Always use fresh, unbleached bread flour with high protein content, around 12 to 13 percent, so the dough develops enough strong gluten structure to trap the steam and hold its shape during the long proofing time.
Final Thoughts
Baking your own sourdough croissants at home is a super rewarding kitchen adventure that fills your house with amazing aromas and brings real joy to everyone around your table. While the process takes time, patience, and a bit of practice, the final result is far superior to anything you can buy at a standard grocery store. Taking simple ingredients like flour, water, and butter and turning them into golden, flaky masterpieces gives you a wonderful sense of pride. Grab your rolling pin, feed your sourdough starter, and enjoy every single step of this delicious homemade baking experience.
Nutrition Details
Here is the approximate nutritional information for one standard homemade sourdough croissant based on a total yield of 10 pastries per batch.
| Nutrient Name | Amount Per Serving | Daily Percentage Value |
| Calories | 340 kcal | 17 percent |
| Total Fat | 20 grams | 26 percent |
| Saturated Fat | 12 grams | 60 percent |
| Trans Fat | 0.5 grams | 0 percent |
| Cholesterol | 55 milligrams | 18 percent |
| Sodium | 240 milligrams | 10 percent |
| Total Carbohydrates | 34 grams | 12 percent |
| Dietary Fiber | 1.5 grams | 5 percent |
| Total Sugars | 6 grams | 12 percent |
| Protein | 6 grams | 12 percent |
| Calcium | 25 milligrams | 2 percent |
| Iron | 2 milligrams | 11 percent |
| Potassium | 65 milligrams | 2 percent |
Disclaimer
This article and recipe are intended purely for informational and educational purposes. Everyone has a unique body, different metabolic rate, and individual nutritional requirements. The health benefits mentioned regarding sourdough fermentation can vary from person to person depending on personal digestive health, gut flora, and ingredient selection. Nutritional estimates provided in the table are calculated based on standard ingredient databases and may change depending on the specific brands or measurements you use in your own kitchen. If you have severe gluten sensitivities, celiac disease, dairy allergies, or any chronic medical conditions, please consult with a qualified doctor or registered dietitian before making significant changes to your daily diet.