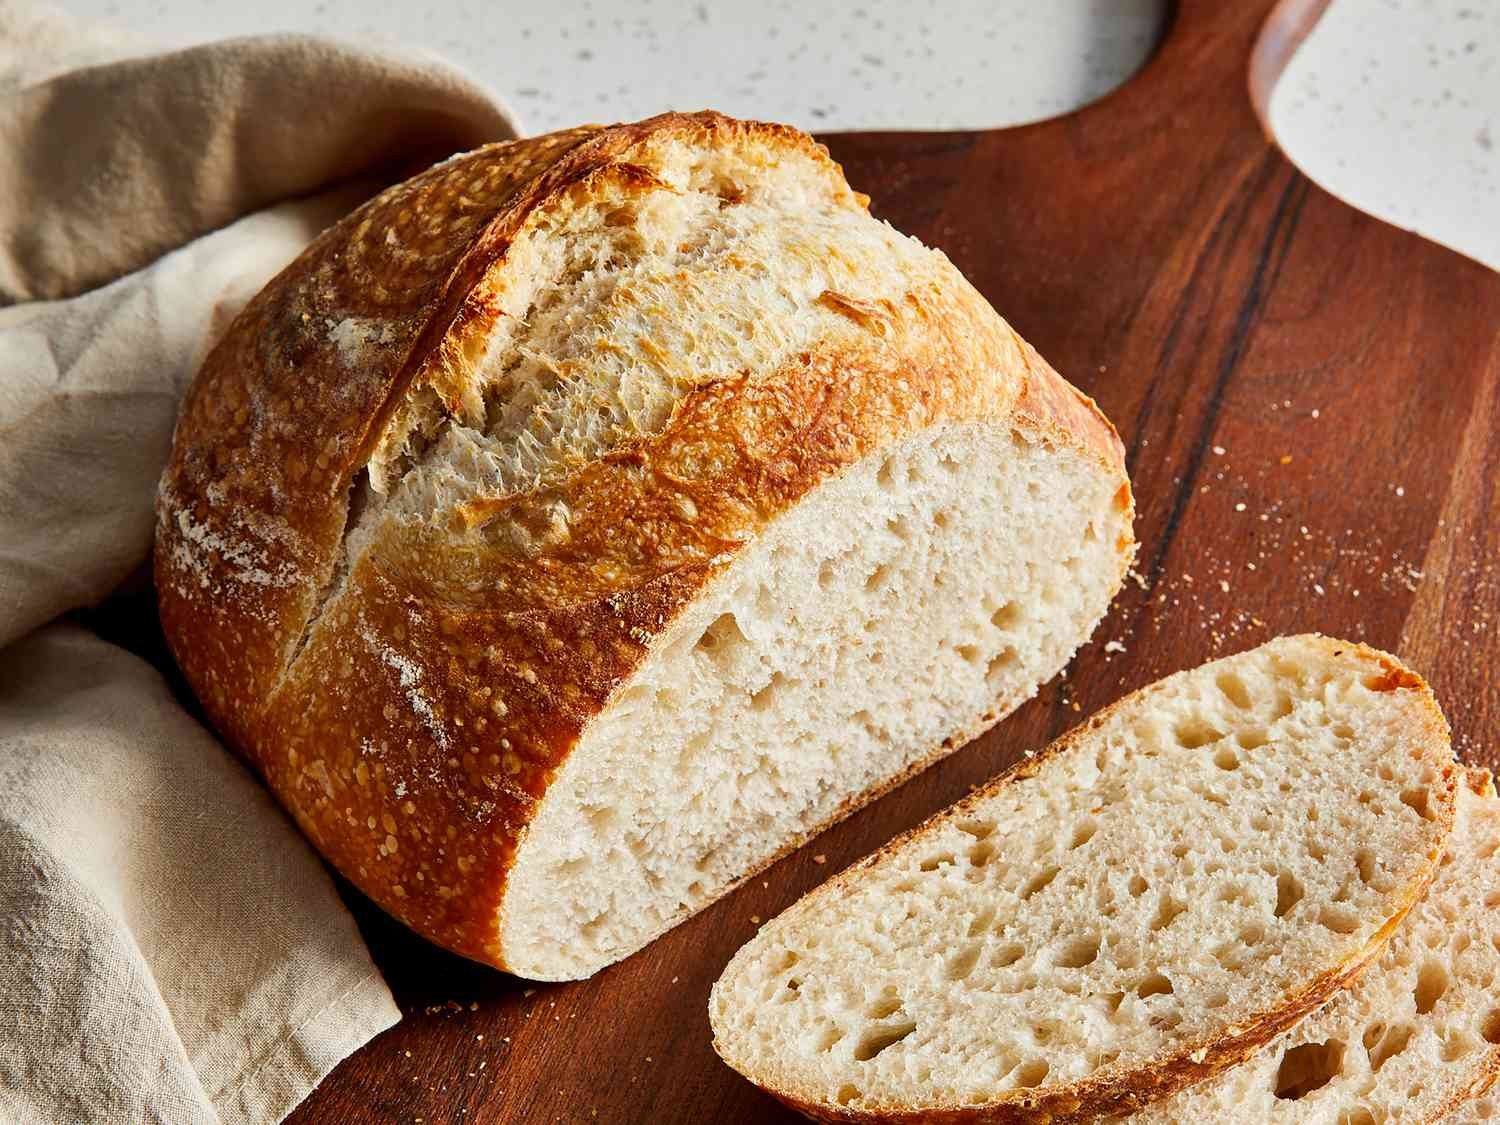
Making homemade sourdough bread is one of the most rewarding kitchen projects you can ever try in your lifetime. This recipe is all about creating a golden loaf of fresh bread from scratch using just flour, water, and simple salt. Unlike regular store bought bread that relies on fast commercial yeast packets, this natural recipe uses a living sourdough starter that ferments the flour over many hours. As the natural yeast works its magic inside the dough, it develops incredible depth of flavor and creates a soft inside surrounded by a super crispy golden crust. You do not need any fancy baking tools or professional culinary skills to master this rustic bread recipe at home. Anyone can learn how to mix, fold, shape, and bake this amazing bread with just a little bit of patience and practice.People all over the world fall deeply in love with sourdough bread for so many wonderful reasons once they try it fresh out of the oven. The contrast between the crackling crunchy outer shell and the tender airy interior creates a eating experience that regular store bread simply cannot match. Every single slice brings a rich tangy aroma and a comforting taste that makes every breakfast or snack feel extra special. Beyond the unbelievable taste and texture, baking sourdough creates a deep personal connection to traditional food preparation methods that have nourished families for thousands of years. Watching a basic mixture of simple flour and warm water turn into a big puffy golden loaf gives you a deep feeling of satisfaction and pride that brightens your whole day.There are many wonderful emotional and physical reasons why you should make this delicious sourdough bread in your own cozy kitchen today. Baking fresh bread is a fantastic way to slow down, reduce daily stress, and practice mindfulness after a long busy week of hard work. The soothing rhythm of kneading or folding the wet dough offers a peaceful creative outlet that fills your entire house with the most comforting warm bakery smells. From a fitness and health perspective, natural sourdough fermentation breaks down tough gluten molecules and phytic acid, making this bread much easier on your stomach than conventional commercial loaves. It provides steady sustained energy without sharp blood sugar spikes, making it an ideal choice for active individuals, athlete meal plans, or anyone wanting whole foods.Whenever you want to impress your close friends at a warm weekend dinner party or simply nourish your family with wholesome ingredients, sourdough is always the perfect choice. You can slice this lovely loaf thick for morning avocado toast, dip big crusty pieces into hot rich soups, or make the best grilled cheese sandwich you have ever tasted in your life. Preparing this recipe during rainy afternoons or quiet lazy mornings transforms simple cooking time into a rewarding hobby that nourishes both your body and your spirit. Once you experience the joy of pulling a steaming golden brown loaf out of your hot oven, you will never want to go back to buying dull plastic wrapped bread from the grocery store ever again.Ingredients You Will NeedHere is everything you need to bake one large rustic loaf of homemade sourdough bread.Active sourdough starter that is bubbly and fed: 100 grams (about one half cup)Warm unchlorinated water around 80 degrees Fahrenheit: 350 grams (about one and one half cups)Bread flour with high protein content: 450 grams (about three and one half cups)Whole wheat flour or rye flour for deep flavor: 50 grams (about one half cup)Fine sea salt or kosher salt: 10 grams (about two teaspoons)Step by Step MethodStep 1: Test Your Sourdough StarterBefore you begin mixing your loaf, make sure your natural sourdough starter is active and strong. Feed your starter about four to six hours before starting your dough so it doubles or triples in size. To check if it is ready to use, drop one small spoonful of starter into a glass of cool water. If the starter floats gently on top of the water, it is ready to bake bread. If it sinks to the bottom, wait a bit longer or feed it once more until it grows super bubbly and light.Step 2: Mix the Water and StarterTake a large clean glass or ceramic mixing bowl and place it on a digital kitchen scale. Pour in 100 grams of your active bubbly sourdough starter. Add 350 grams of warm unchlorinated water into the same bowl. Use a wooden spoon or your clean fingers to stir the starter and water together until the starter completely dissolves into a milky white liquid.Step 3: Add the Flour and Perform AutolyseAdd 450 grams of bread flour and 50 grams of whole wheat flour directly into your liquid mixture. Use a sturdy spatula or your hands to mix everything together until all dry flour disappears. The mixture will look like a shaggy rough dough ball at this stage. Cover the bowl with a damp cloth or plastic wrap and let it rest undisturbed at room temperature for 45 minutes. This important resting period is called autolyse, and it allows the flour to absorb water fully and start forming natural gluten structure.Step 4: Add Salt and KneadAfter the dough has rested, sprinkle 10 grams of fine sea salt evenly over the top of the dough ball. Wet your hands with a little cool water to prevent sticking. Dimple the salt into the dough with your fingertips and gently squeeze the dough between your fingers to distribute the salt. Grab one side of the dough, stretch it upwards gently without tearing it, and fold it back over the center. Rotate the bowl a quarter turn and repeat this stretch and fold motion four or five times until the dough feels smooth and elastic. Cover the bowl again.Step 5: Perform Stretch and FoldsInstead of traditional intense hand kneading, sourdough uses gentle stretches over time to build strength. Over the next two hours, you will perform four sets of stretches and folds spaced 30 minutes apart. To do a set, wet your hands, reach under one edge of the dough, lift it up high, and fold it over its top. Turn the bowl a quarter turn and stretch the next side. Do this four times around the entire bowl for each set. You will notice the dough becoming smoother and tighter after every single set.Step 6: Bulk FermentationCover the bowl tightly with a wet towel or plastic wrapper after your final stretch and fold set. Leave the bowl on your kitchen counter at room temperature to rise. This crucial resting phase is called bulk fermentation. Depending on how warm your kitchen is, this step can take anywhere from four to eight hours. The dough is finished with bulk fermentation when it has grown by about 50 percent in total volume, shows nice air bubbles on top, and feels light and jiggly when you gently shake the bowl.Step 7: Shape the DoughLightly dust your clean work surface with a small amount of bread flour. Gently tip the puffy dough out of the bowl onto the counter using a dough scraper. Do not deflate the precious gas bubbles inside. Gently pull the top edge of the dough toward you, then fold the sides into the center like an envelope. Roll the dough up into a round ball. Place your clean hands behind the ball and pull it toward your body along the counter surface. This movement creates tension on the outer skin of the dough ball, which helps it rise up high inside the hot oven instead of spreading flat.Step 8: Bench Rest and Final ShapingLet the shaped dough ball sit uncovered on your counter for 20 minutes to relax the gluten fibers. While it rests, dust a round bread proofing basket or a medium bowl lined with a clean cotton towel generously with rice flour or bread flour. After the brief rest, flip the dough ball upside down, repeat one gentle folding motion to tighten it again, and lift it carefully into your prepared proofing basket with the smooth side facing down and the bottom seam facing up.Step 9: Cold Fermentation in the RefrigeratorCover the basket with a clean bag or plastic shower cap to hold in moisture. Place the basket inside your refrigerator to rest overnight for 12 to 18 hours. This cold fermentation period slows down the yeast growth while allowing natural bacteria to produce complex tangy flavors. It also makes the dough firm and much easier to score right before baking.Step 10: Preheat Your Oven and Dutch OvenThe next morning, place a heavy iron Dutch oven with its lid on inside your oven. Set your oven temperature to 450 degrees Fahrenheit (230 degrees Celsius). Let the oven and the covered Dutch oven heat up together for at least 45 to 60 minutes so the heavy pot becomes scorching hot.Step 11: Score the DoughCarefully remove your cold dough basket from the refrigerator. Place a sheet of parchment paper over the top of the basket, then flip the basket upside down so the dough rests smoothly on the paper. Lift the basket away. Dust a tiny bit of flour over the top of your loaf. Using a very sharp razor blade or kitchen knife, make a clean shallow slash across the top of the dough at a slight angle. This cut controls where steam escapes so your loaf expands beautifully.Step 12: Bake the Sourdough LoafCarefully pull the hot Dutch oven out of the main oven using thick heatproof oven mitts. Take off the lid. Grab the edges of the parchment paper and gently lower the scored dough into the hot iron pot. Put the hot lid back on top of the Dutch oven immediately. Place the covered pot into the oven and bake for 20 minutes with the lid on to trap steam for maximum oven spring.Step 13: Uncover and Finish BakingAfter 20 minutes, carefully remove the lid from your Dutch oven. You will see a pale, nicely risen loaf of bread. Lower your oven temperature slightly to 425 degrees Fahrenheit (220 degrees Celsius). Continue baking uncovered for another 20 to 25 minutes until the crust turns a rich deep golden brown color and sounds hollow when you tap the bottom.Step 14: Cool Completely Before SlicingCarefully lift the finished loaf out of the Dutch oven using the parchment paper edges. Transfer the hot bread onto a wire cooling rack. Allow the loaf to cool completely at room temperature for at least two hours before slicing into it with a serrated bread knife. Cutting into hot bread ruins the interior crumb structure by trapping moisture, so patience is key for the best results.Why This Recipe Is SpecialThis homemade sourdough bread recipe stands out because it relies purely on natural ancient baking techniques rather than modern short cuts. By using only three base ingredients flour, water, and salt you create a food product that is completely free from added sugars, artificial preservatives, vegetable oils, and chemical dough conditioners commonly found in commercial packaged breads.From a health point of view, the long slow fermentation process works like a partial pre digestion step. The wild yeast and beneficial lactic acid bacteria work together to break down complex starches and tough proteins like gluten. This breakdown means people who experience bloating or mild sensitivity when eating regular fast rise factory bread often find natural sourdough far easier to digest. Furthermore, the lactic acid lowers the bread ph level, which neutralizes phytic acid. Phytic acid is an antinutrient found in grains that blocks your body from absorbing vital minerals like zinc, magnesium, iron, and calcium. By reducing phytic acid, sourdough allows your gut to absorb maximum nutrients from the flour.The taste and texture profile of this sourdough bread is truly incredible. The natural fermentation produces acetic and lactic acids that give the bread its signature complex sour flavor that delights your taste buds. The high heat baking method inside a covered iron pot traps rising steam, creating a thin glass like outer crust that cracks loudly when squeezed. Inside, you discover a soft, chewy, moist interior filled with irregular open pockets. It satisfies your cravings while keeping you full and energized for hours due to its lower glycemic index.Extra Tips for Better TasteTo take your homemade sourdough bread to the next level of flavor and quality, consider trying these simple creative ideas:Add fresh garden herbs like chopped rosemary, thyme, or roasted garlic cloves into the dough during your third set of stretches and folds for a savory flavor boost.Mix in 50 grams of toasted seeds like pumpkin seeds, sunflower seeds, or sesame seeds to add a crunchy nuttiness and extra healthy fats to every bite.Replace 100 grams of white bread flour with dark whole rye flour or stone ground whole wheat flour to achieve a deeper, earthy whole grain taste profile.Use bottled spring water or filtered tap water instead of municipal tap water, as chlorine can stunt the growth of natural wild yeast in your starter.Bake your loaf a few minutes longer until it reaches a dark mahogany color for a rich caramel flavor note known to French bakers as bien cuit.Swap out plain water for warm unsweetened green tea or beer for a unique adult twist on traditional bread flavor.Store your sliced bread cut side down on a wooden cutting board or in a breathable paper bag to keep the crust crunchy for up to three full days.Final ThoughtsBaking your own sourdough bread at home is a wonderfully satisfying journey filled with delicious learning moments and great edible rewards. While it requires a bit of time and planning, the actual hands on work is remarkably easy and peaceful once you get used to the basic steps. Do not worry if your first loaf looks a little flat or imperfect, because even less than perfect sourdough tastes fantastic when toasted with fresh butter. Keep practicing, enjoy the calming process of working with live dough, and share your fresh warm loaves with the people you love most.Nutrition DetailsBelow is the nutritional breakdown for the complete recipe as well as estimated values per slice, based on cutting one loaf into twelve equal slices.Full Recipe vs Per Serving Nutrition TableNutrient ComponentEntire Recipe (1 Loaf)Per Serving (1 Slice)Total Calories1850 kcal154 kcalCarbohydrates380 grams31.6 gramsDietary Fiber22 grams1.8 gramsSugars4 grams0.3 gramsTotal Protein62 grams5.1 gramsTotal Fat5 grams0.4 gramsSaturated Fat1 gram0.1 gramsSodium3900 milligrams325 milligramsPotassium650 milligrams54 milligramsCalcium90 milligrams7.5 milligramsIron18 milligrams1.5 milligramsDisclaimerThis sourdough bread recipe and nutritional guide is meant for general educational and cooking purposes only. Individual nutritional needs, calorie calculations, and digestive responses can vary based on exact flour brands used, local humidity levels, yeast activity, and individual body health. Sourdough bread contains naturally occurring gluten and is not suitable for individuals diagnosed with celiac disease or severe non celiac gluten sensitivity. Always consult a qualified medical doctor or registered dietitian if you have specific dietary concerns or health conditions.