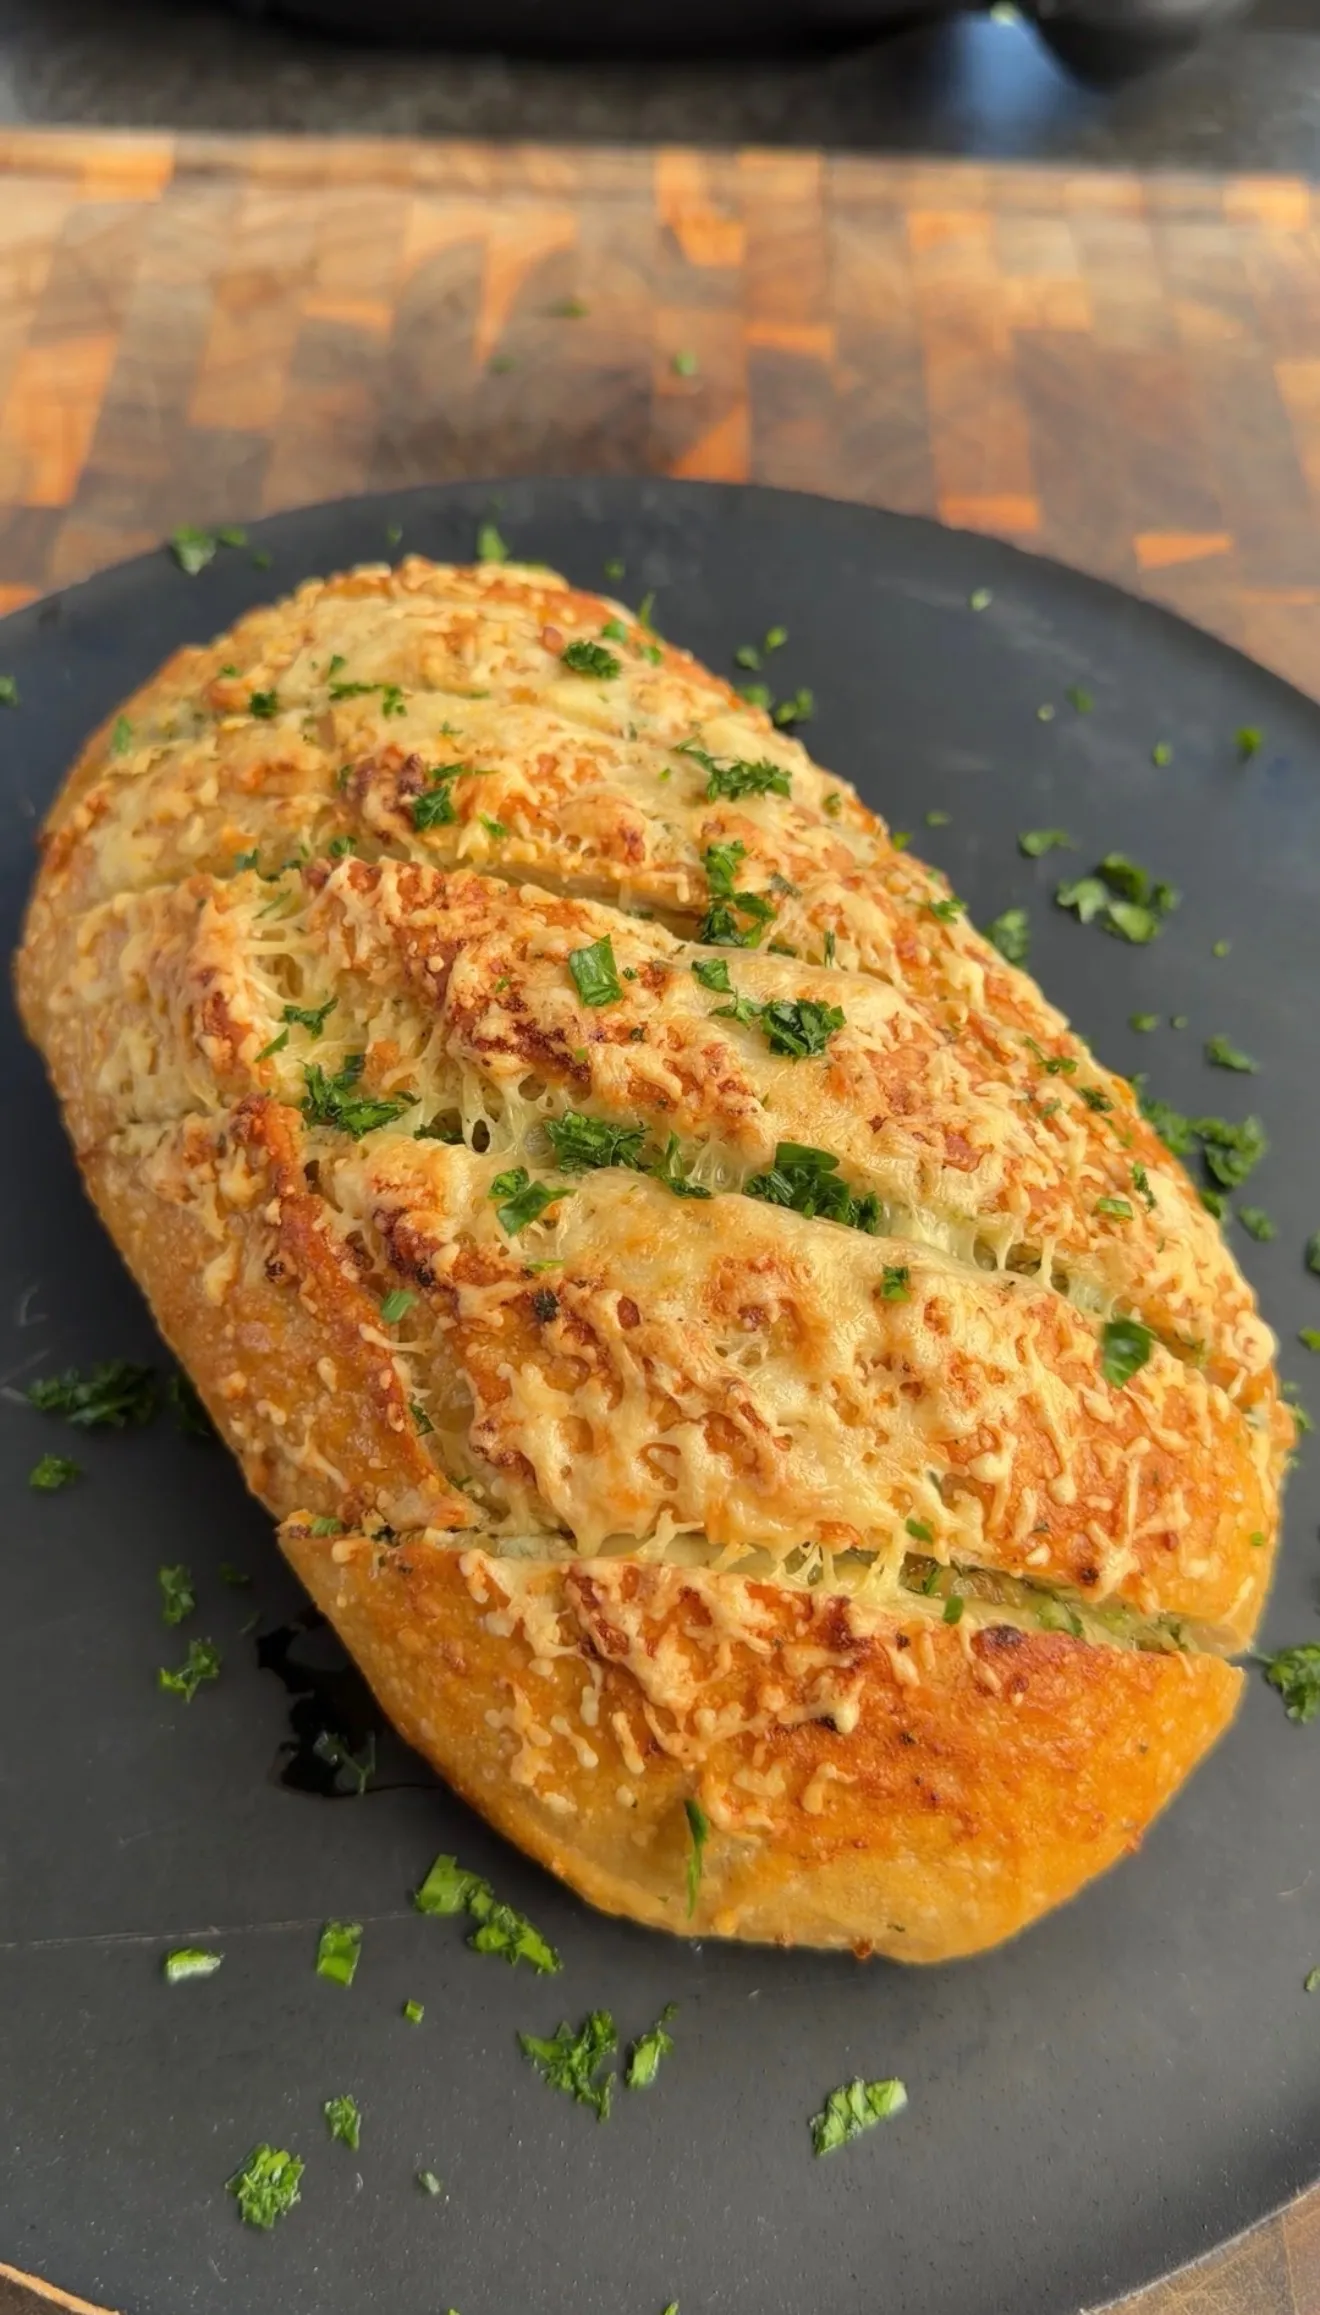
Baking bread at home is one of the most rewarding culinary journeys you can ever decide to take in your lifetime. This recipe is all about creating a handcrafted loaf of sourdough bread that is packed with rich garlic and aromatic herbs. If you have ever walked into a bakery and smelled the deep scent of freshly baked dough mixed with roasted garlic, you already know how incredible this combination is. Sourdough bread relies on natural yeast and beneficial bacteria to rise, which gives it a distinct tangy flavor profile and a chewy texture that manufactured store bought loaves can never match. When you add fresh garlic, sweet olive oil, and vibrant green herbs to this ancient baking technique, you turn a simple loaf of bread into an absolute masterpiece of home cooking.
People all over the world fall completely in love with this loaf because it offers a total sensory experience from start to finish. The crust bakes into a gorgeous golden brown shell that crackles delightfully whenever you slice through it with a sharp bread knife. Inside, the crumb is soft, airy, and filled with tiny pockets of flavorful herbs and soft garlic pieces that melt in your mouth. Sourdough brings a deep satisfying tang that balances the rich buttery earthiness of garlic and herbs like rosemary, thyme, and oregano. Every single bite delivers a wonderful contrast of textures, from the crispy exterior to the pillowy center, making it impossible to stop after eating just one slice.
There are so many wonderful reasons and special occasions to make this savory loaf in your own home kitchen. Baking this bread provides a soothing emotional outlet after a long and stressful week, allowing you to slow down, focus on simple manual tasks, and enjoy the comforting rhythm of working with your hands. On cold lazy weekend afternoons, the rich aroma of garlic and herbs roasting inside the oven fills every room, instantly making your home feel warmer, cozier, and more welcoming. From a health and fitness perspective, sourdough is far gentler on your digestive system than quick breads made with commercial yeast because the long fermentation process breaks down gluten and phytic acid.
Whether you are preparing a hearty Sunday dinner for your entire extended family or simply looking to elevate your daily meal prep, this recipe fits perfectly into any food routine. It pairs amazingly well with hot soups, rich pasta dishes, fresh green salads, or can even be eaten plain with a thick spread of real grass fed butter. Beginners often feel intimidated by the idea of baking sourdough, but this straightforward approach removes all the guesswork so you can achieve success on your very first try. Preparing your own food using simple natural ingredients gives you complete control over what goes into your body, making this comforting bake both a delicious treat and a nourishing choice for your everyday lifestyle.
Ingredients You Will Need
-
100 grams active sourdough starter fed and bubbly
-
375 grams warm water around 80 degrees Fahrenheit
-
500 grams unbleached bread flour high protein content
-
10 grams fine sea salt or kosher salt
-
6 cloves fresh garlic minced or finely chopped
-
1 tablespoon extra virgin olive oil
-
1 tablespoon fresh rosemary finely chopped
-
1 tablespoon fresh thyme leaves chopped
-
1 tablespoon fresh oregano or dried Italian seasoning
-
1 extra tablespoon flour for dusting during shaping
Step by Step Method
-
Start by preparing your flavor ingredients first so they are ready when you need them. Heat one tablespoon of extra virgin olive oil in a small pan over low heat. Add your six minced cloves of garlic and cook them gently for about two minutes until they are soft and fragrant. Do not let the garlic turn brown or burn because burnt garlic tastes bitter. Remove the pan from the stove and stir in the chopped rosemary, thyme, and oregano. Let this mixture cool down completely to room temperature before adding it to your dough.
-
In a large mixing bowl, combine your 100 grams of active sourdough starter with 375 grams of warm water. Use a wooden spoon or a spatula to stir the water and starter together until the starter completely dissolves and the water looks cloudy and milky.
-
Add 500 grams of unbleached bread flour into the bowl with the water and starter mixture. Mix everything together with your hands or a heavy spoon until all the dry flour disappears and a shaggy dough forms. Cover the bowl with a clean damp kitchen towel and let it rest undisturbed for 30 minutes. This resting period is called autolyse, and it allows the flour to fully absorb the water and start developing gluten naturally.
-
After the 30 minute rest, sprinkle the 10 grams of fine sea salt evenly over the top of the dough. Pour your completely cooled garlic and herb oil mixture directly on top of the salt and dough.
-
Now you will begin the working phase of the dough using a technique called stretch and fold instead of traditional heavy kneading. Reach down into the edge of the bowl, grab a portion of the dough, gently stretch it upward toward the ceiling, and fold it over the top center of the dough mass. Turn the bowl ninety degrees and repeat this action. Do this four times total until you have completed a full circle around the bowl.
-
Cover the bowl again with your damp towel and let it rest for 30 minutes. You will need to perform three more sets of these stretch and fold steps every 30 minutes over the next hour and a half. With each set, you will notice the dough becoming smoother, stronger, and much more elastic.
-
After completing your four total sets of stretch and folds, cover the bowl tightly with plastic wrap or a lid. Place the bowl in a warm place in your kitchen to undergo bulk fermentation. Let the dough rise undisturbed for four to six hours, depending on your room temperature. The dough is ready when it has increased in size by roughly fifty percent, looks lighter, and shows visible air bubbles on the surface.
-
Gently tip the risen dough out of the bowl onto a lightly floured clean work surface. Do not punch the dough down roughly because you want to keep those precious air bubbles inside. Lightly sprinkle the top of the dough with a little flour.
-
Shape the dough by gently stretching it into a rough rectangle. Fold the right side over into the middle, then fold the left side over the top like an envelope. Roll the dough up from the bottom edge into a neat round ball shape. Use your hands to pull the dough ball gently toward you across the counter surface to build surface tension on top of the loaf.
-
Lightly flour a proofing basket or a round bowl lined with a clean dish towel. Carefully lift your shaped dough ball and place it upside down into the basket so the smooth top side rests at the bottom.
-
Cover the basket loosely with a towel or plastic cover. Transfer the basket into your refrigerator for a cold final proof lasting anywhere from 8 to 12 hours, or overnight. This slow cold rise develops incredible sourdough flavor and makes the dough much easier to slice right before baking.
-
When you are ready to bake, place a large heavy Dutch oven with its lid inside your oven. Preheat your oven to 450 degrees Fahrenheit for at least 45 minutes so the pot becomes extremely hot.
-
Carefully take your dough out of the refrigerator. Cut a sheet of parchment paper and place it over the top of the proofing basket. Place a small cutting board over the paper and quickly flip the basket upside down so the dough lands gently onto the parchment paper.
-
Use a very sharp razor blade, lame, or kitchen shears to make a clean deep cut across the top of the dough ball. This cut, called scoring, allows steam to escape controlled and helps the bread expand properly during the initial baking phase.
-
Carefully remove the hot Dutch oven from your preheated oven using heavy oven mitts. Use the edges of the parchment paper to pick up the dough and gently lower it inside the hot pot. Put the heavy lid back on the pot and place it in the oven.
-
Bake the bread covered with the lid on for 20 minutes. The trapped steam inside the pot will keep the crust soft initially so the bread can rise up high.
-
After 20 minutes, carefully remove the lid from the Dutch oven. You will see a pale, nicely risen loaf. Continue baking uncovered for another 20 to 25 minutes until the crust turns a rich deep golden brown color and feels firm.
-
Carefully lift the finished bread out of the Dutch oven and transfer it to a wire cooling rack. Allow the loaf to cool completely for at least two hours before cutting into it. Slicing warm sourdough too early compresses the soft inside crumb and makes it gummy, so patience pays off tremendously here.
Why This Recipe Is Special
This garlic and herb sourdough recipe stands out because it combines traditional baking heritage with rich modern savory flavors. Unlike basic white store bought breads that rely on fast acting commercial yeast and chemical additives, real sourdough goes through a long natural fermentation process. This slow process transforms simple grains into a complex nutritional source that is far easier on human digestion. The natural lactic acid bacteria present in the sourdough starter break down complex starches and proteins, which reduces the overall gluten content and makes nutrients like iron, magnesium, and zinc far easier for your body to absorb.
From a flavor standpoint, this recipe offers a delicious profile that plain breads simply cannot match. The gentle sauteing of the garlic before mixing it into the dough removes the harsh raw bite and creates a subtle sweet flavor that spreads throughout the entire loaf. Combining fresh green herbs directly into the dough infuses every single slice with herbal aromatic notes that make your whole kitchen smell like an authentic Italian bakery. The natural acidity of the sourdough starter keeps the bread moist for days without needing any artificial preservatives or added sugars.
Additionally, baking sourdough at home offers profound mental health benefits that modern life often lacks. Taking time away from phone screens to touch dough, monitor its progress, and smell real ingredients baking creates a grounded sense of satisfaction and mindfulness. It allows beginners to reconnect with basic cooking skills and share nutritious, handmade food with friends and family members. Eating real whole food ingredients that you transformed yourself builds confidence and supports a healthy, balanced lifestyle.
Extra Tips for Better Taste
To take your garlic and herb sourdough bread to an even higher culinary level, consider trying out these creative tips and flavor twists:
-
Swap standard minced garlic for fully roasted garlic cloves. Roast a whole head of garlic wrapped in foil in the oven until the cloves become soft, sweet, and spreadable, then fold them directly into your dough during the stretch and fold phase.
-
Mix in half a cup of shredded sharp cheddar, parmesan, or gruyere cheese along with the herbs to create a rich savory cheese loaf with amazing melty pockets.
-
Experiment with different fresh herb combinations depending on the season, such as adding fresh chopped basil in the summer or fresh sage during the autumn months.
-
Brush the top crust of the loaf with melted garlic butter and a sprinkle of coarse sea salt right as soon as you remove it from the hot oven for an extra glossy finish and rich salty bite.
-
Use filtered water instead of tap water when mixing your dough because chlorine in city tap water can sometimes weaken your wild sourdough starter yeast.
Final Thoughts
Baking your own homemade garlic and herb sourdough bread is a truly joyful experience that yields incredible culinary rewards. With just a few basic natural ingredients and a little bit of patience, you can transform simple flour and water into a bakery quality loaf that nourishes both your body and your soul. Do not worry if your very first attempt does not look entirely perfect, because sourdough is a continuous learning practice and every single loaf you bake will taste delicious regardless of its shape. Grab your mixing bowl, enjoy the slow hands on process, and look forward to sharing warm slices of fresh savory bread with the people you love most.
Nutrition Details
| Component | Value Per Serving |
| Total Servings Per Loaf | 10 Slices |
| Calories | 195 kcal |
| Carbohydrates | 38 g |
| Protein | 6 g |
| Total Fat | 2.5 g |
| Saturated Fat | 0.4 g |
| Dietary Fiber | 2 g |
| Sugar | 0.5 g |
| Sodium | 390 mg |
| Potassium | 75 mg |
| Calcium | 15 mg |
| Iron | 2.2 mg |
The values provided above are estimated calculations based on standard ingredient measurements used in this specific recipe. Actual nutritional content may vary depending on the exact brand of flour used, specific starter activity, and individual slice thickness.
Disclaimer
The health and nutritional information provided in this article is meant for general educational purposes only and should not be taken as professional medical advice. Everyone has a unique biological body, individual digestive system, and personal dietary needs, so individual results and food tolerances will naturally vary. If you have specific medical conditions, gluten sensitivities, or dietary restrictions, please consult with a qualified doctor or registered dietitian before introducing new fermented foods into your regular daily eating routine.