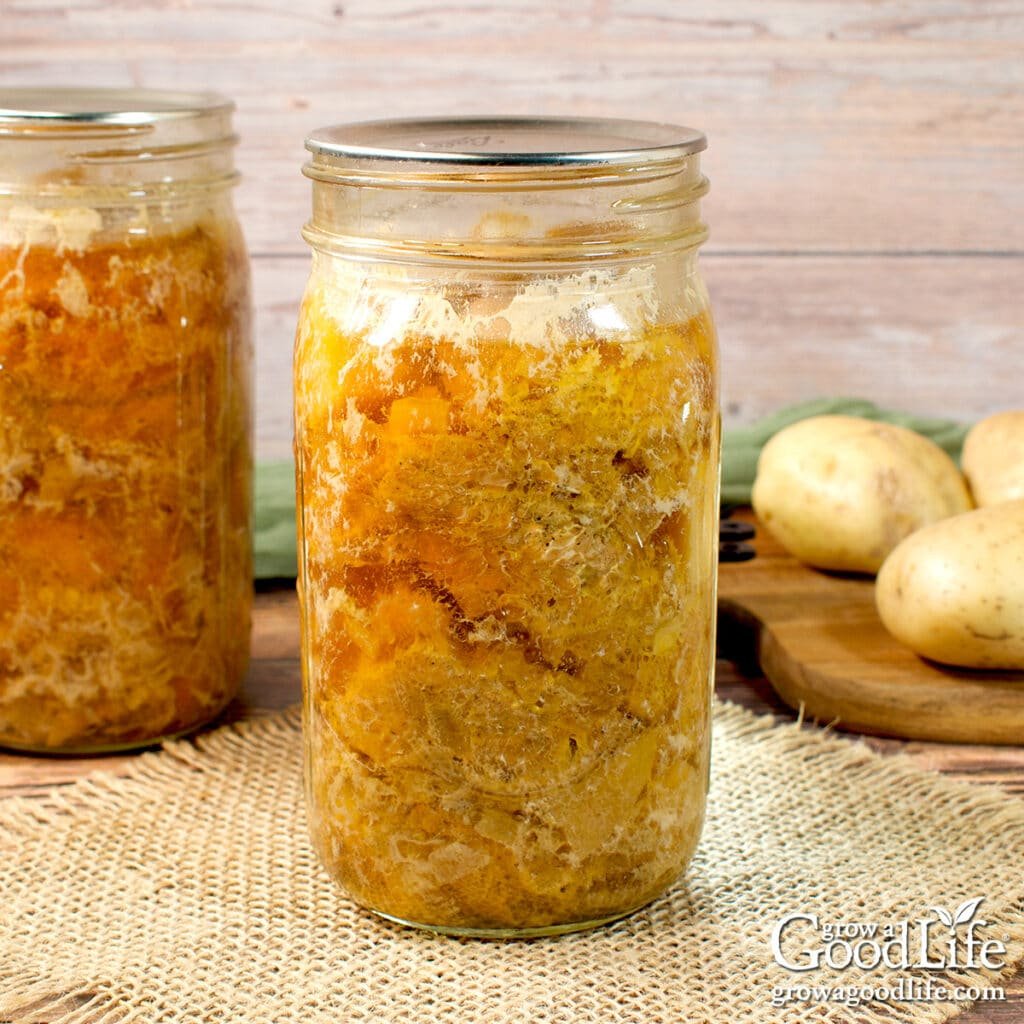
Canning homemade chicken is a wonderful tradition that brings warmth, comfort, and convenience right into your everyday kitchen routine. When you preserve fresh chicken at home using a pressure canner, you are creating rich jars of tender meat that are ready to eat whenever you need a quick and wholesome meal. This whole process turns simple fresh chicken into shelf stable magic that can sit safely in your pantry for months without needing any freezer space at all. Many people choose to learn this method because it lets them control every single ingredient that goes into their food supply. You do not have to worry about unwanted chemical preservatives, excess sodium, or artificial flavor enhancers that are often found in store bought canned goods. Creating your own canned chicken allows you to keep pure, delicious, and healthy protein stocked in your home at all times. It gives you complete peace of mind knowing that you have high quality food ready for busy weeknights, power outages, or sudden unexpected guests. The chicken turns out surprisingly soft, juicy, and packed with deep natural flavor that far surpasses anything you could ever purchase at a local grocery store. Learning this skill transforms the way you cook and plan meals for your family every single week.
People absolutely love canning chicken at home for so many practical and emotional reasons. One of the biggest reasons is the sheer convenience of having fully cooked, tender meat ready to pull from the shelf in seconds. Imagine coming home after a long, exhausting day at work with zero energy to start cooking a fresh meal from scratch. With your own canned chicken sitting in the pantry, you can pop open a jar and have a piping hot meal like chicken soup, chicken salad, or chicken tacos ready in less than ten minutes. The texture of home canned chicken is remarkably soft and easily shreds with a simple fork, making it ideal for a vast variety of quick recipes. Beyond the sheer convenience, people love the incredible money savings that come with buying fresh chicken in bulk when it goes on sale. You can purchase large quantities of chicken breast or thighs at discount prices and preserve them immediately so nothing ever goes to waste in your freezer. The simple act of filling your pantry shelves with gleaming jars of home cooked food also brings a deep sense of pride, self reliance, and comforting security. Seeing those glass jars stacked neatly in your kitchen gives you a warm feeling of accomplishment that fast food or factory made products can never match.
There are countless perfect moments and reasons to start canning your own chicken at home. If you are focused on fitness, health, or clean eating goals, home canned chicken is a total game changer for meal preparation. It provides clean, lean, low fat protein with zero hidden additives, helping you stay on track with your nutritional targets without spending hours cooking every day. For busy parents and hardworking individuals, it removes the daily stress of deciding what to make for dinner when time is extremely short. It is also an essential practice for anyone interested in emergency preparedness, homesteading, or reducing their reliance on electric freezers that can fail during storm power outages. Emotionally, cooking and preserving food at home connects you to traditional kitchen wisdom passed down through generations of home cooks. The mouthwatering aroma of simmering chicken broth and savory seasonings filling your house creates an atmosphere of love, comfort, and cozy warmth. Whether you are preparing for future winter days, packing smart meals for outdoor camping trips, or simply wanting to feed your family wholesome food, canning chicken fits seamlessly into your lifestyle. It turns basic cooking into a rewarding hobby that nourishes both your body and your heart every time you open a fresh jar.
Mastering the art of canning chicken is surprisingly easy once you understand the simple fundamental steps involved. You do not need to be a professional chef or an expert preserver to achieve perfect, safe, and mouthwatering results on your very first try. All it takes is a bit of patience, fresh high quality ingredients, and the right kitchen tools, specifically a trustworthy pressure canner designed for low acid foods. As you gain experience with the process, you will discover how satisfying it is to turn raw meat into long lasting pantry staples that taste incredible. The chicken absorbs all the subtle flavors of the sea salt, garlic, herbs, and warm broth as it cooks inside the sealed glass jar under pressure. Every jar becomes a ready made starter base for endless delicious dishes like chicken pot pies, warm casseroles, comforting stews, and zesty wraps. Preserving your own meat at home simplifies your life, saves precious grocery dollars, and elevates the quality of your daily meals. Once you taste the rich natural flavor and experience the incredible convenience of homemade canned chicken, you will never want to go back to store bought alternatives again. It is truly one of the most useful and satisfying cooking skills you can ever bring into your home kitchen.
Ingredients You Will Need
To make eight pint jars of delicious home canned chicken, you will need the following fresh ingredients and supplies:
-
Fresh raw chicken breasts or thighs: 10 pounds (boneless and skinless works best)
-
Canning sea salt or kosher salt: 4 teaspoons total (1/2 teaspoon per pint jar)
-
Boiling water or warm homemade chicken broth: 4 cups (optional if using raw pack method)
-
Fresh garlic cloves: 8 whole cloves (1 clove per pint jar for extra flavor)
-
Dried thyme leaves: 2 teaspoons total (1/4 teaspoon per pint jar)
-
Ground black pepper: 1 teaspoon total (1/8 teaspoon per pint jar)
-
Whole bay leaves: 8 small leaves (1 leaf per pint jar)
-
Fresh lemon juice: 2 tablespoons (optional for a bright touch of flavor)
Step by Step Method
Step 1: Sanitize Your Jars and Equipment
First, thoroughly wash eight pint sized glass canning jars, brand new flat lids, and metal screw bands in warm soapy water. Rinse them completely with clean water to remove all soap residue. Place the clean glass jars into a large pot filled with hot water to keep them warm until you are ready to pack them. Keeping the glass jars warm prevents them from cracking when hot food or hot liquids are added later. Place your new flat canning lids in a small bowl of warm water to soften the rubber sealing rings. Clean your kitchen counters, cutting boards, and knives thoroughly to maintain a completely hygienic working environment.
Step 2: Prepare and Trim the Fresh Chicken
Take your ten pounds of fresh chicken breasts or thighs and place them on a clean cutting board. Pat the meat dry with clean paper towels to remove extra surface moisture. Carefully trim away any excess fat, yellow skin, or gristle using a sharp chef knife. Trimming the excess fat is very important because too much fat can interfere with the sealing process of the jar lids during pressure canning. Once trimmed, cut the chicken into uniform bite sized cubes or strips that are about one inch to two inches in size. Keeping the pieces uniform in size ensures that all the meat cooks evenly inside the pressure canner.
Step 3: Season the Chicken Pieces
Place all your trimmed, cubed chicken into a large mixing bowl. Add the dried thyme leaves, ground black pepper, and optional fresh lemon juice over the top of the raw meat. Toss the chicken pieces gently using clean tongs or your hands until every piece is lightly coated with the aromatic seasonings. Mixing the spices directly with the meat before packing ensures that the delightful herb flavors are evenly distributed throughout every single jar you make.
Step 4: Pack the Raw Chicken into Warm Jars
Carefully remove your warm glass jars from the hot water bath one by one. Place one small whole bay leaf, one whole peeled garlic clove, and one half teaspoon of canning sea salt into the bottom of each empty pint jar. Using clean kitchen tongs, fill each jar with the seasoned raw chicken pieces. Press the meat down gently into the jar, but do not pack it too tightly. Leave exactly one inch of empty space at the top of the jar, which is known as headspace. This one inch headspace is crucial because the chicken expands as it cooks under high pressure.
Step 5: Choose Your Packing Method (Raw Pack vs Hot Pack)
If you choose the raw pack method, you do not need to add any extra liquid, broth, or water to the jars. The raw chicken will naturally release its own rich juices during the canning process and create a natural broth inside the jar. If you prefer the hot pack method, simmer the chicken in boiling water or homemade broth for five minutes first, pack the hot meat into the jars leaving one inch headspace, and then pour the boiling hot broth over the chicken, again leaving one inch of headspace. Both methods work wonderfully, but raw packing is often faster and yields remarkably tender meat.
Step 6: Clean the Jar Rims Thoroughly
Take a clean paper towel or a small cloth and dip it in plain white vinegar. Carefully wipe the top glass rim of every filled jar to remove any traces of grease, oil, chicken juice, or salt crystals. Having a perfectly clean and smooth glass rim is essential because even a tiny speck of fat or food residue can prevent the flat lid from sealing properly, causing the jar to fail.
Step 7: Place the Lids and Secure the Bands
Place one warm, softened flat lid directly onto the center of each cleaned jar rim. Thread a metal screw band over the lid and twist it clockwise with your fingers until it is finger tip tight. Finger tip tight means you turn the ring until you feel light resistance, and then give it just a tiny bit more of a turn using only your fingers, not your full wrist or arm strength. Do not overtighten the bands, as air needs to escape from inside the jars during the heating process.
Step 8: Prepare the Pressure Canner
Place your pressure canner on the stove burner. Pour two to three inches of hot water into the bottom of the canner, according to the manufacturer instructions for your specific canner model. Place the inner metal rack inside the bottom of the canner to keep the glass jars elevated off the direct heat. Carefully place your filled, sealed jars onto the rack inside the pressure canner, ensuring the jars do not touch each other directly so steam can circulate freely around them.
Step 9: Vent the Pressure Canner
Lock the heavy lid of your pressure canner securely into place according to your manufacturer directions, leaving the petcock open or leaving the weight off the vent pipe. Turn the stove burner heat to high and bring the water inside to a rolling boil. Allow steam to vent continuously from the open pipe or petcock for a full ten minutes. Venting for ten minutes removes all the cold air trapped inside the vessel, ensuring that the inside atmosphere consists purely of hot steam, which is necessary for safe canning.
Step 10: Bring to Target Pressure and Process
After venting steam for ten minutes, place the pressure regulator weight on the vent pipe or close the petcock. Allow the pressure inside the canner to build up until the pressure gauge reaches ten pounds of pressure (use eleven pounds if using a dial gauge, or adjust for your local altitude if you live high above sea level). Once the target pressure is reached, start your timer immediately. Process the pint jars continuously at that exact pressure for seventy five minutes (if using quart jars, process for ninety minutes). Adjust your stove heat carefully to keep the pressure steady throughout the entire processing duration.
Step 11: Depressurize Naturally
When the seventy five minutes are finished, turn off the stove burner completely. Leave the pressure canner sitting untouched on the stove top and let it cool down and depressurize all by itself naturally. Never try to force the canner to cool down faster by applying cold towels or removing the weight early, as sudden pressure changes will cause liquid to boil over and pop out of the jars, breaking the seals. Wait until the pressure gauge drops completely to zero and the safety lock drops down on its own.
Step 12: Remove the Jars and Let Them Cool
Once the canner has completely depressurized, carefully remove the weight from the vent pipe, wait two minutes, and then unlock and open the canner lid away from your face to avoid hot steam. Using a sturdy jar lifter tool, gently lift the hot jars out of the canner one at a time, keeping them completely upright. Place the hot glass jars onto a thick wooden cutting board or a clean bath towel laid out on your counter away from cold drafts. Leave the jars untouched to cool naturally at room temperature for twelve to twenty four hours.
Step 13: Test the Jar Seals
As the jars cool, you will hear delightful popping or pinging sounds, which indicate that the lids are pulling down and sealing tight. After twenty four hours, test every single seal by pressing down firmly on the center of each metal lid with your finger. If the lid is firm and does not move or make a clicking sound, the jar is successfully sealed. Remove the metal screw bands and gently lift the jar by the edges of the flat lid to double check the hold. Store sealed jars in a dark, cool pantry. Any jar that failed to seal properly should be placed in the refrigerator and consumed within three days.
Why This Recipe Is Special
This homemade canned chicken recipe stands out as a superior culinary practice for many wonderful health, taste, and practical reasons. First and foremost, preparing your own canned meats gives you absolute control over what enters your body. Commercial canned chicken products found on grocery store shelves are frequently packed with massive amounts of sodium, preservative chemicals, artificial flavor enhancers, and modified food starches that are added to stretch shelf life and artificially improve weight. This natural home recipe uses only fresh lean chicken, pure sea salt, garlic, and clean natural spices. You get pure protein without any unwanted chemical extras, making it an extraordinarily healthy staple for your family.
From a fitness and health perspective, this recipe is a total nutrition powerhouse. Chicken breast and lean chicken thighs are rich in high quality protein, essential B vitamins, phosphorus, and niacin, which support muscle repair, brain function, and natural daily energy levels. Because the chicken is cooked inside a sealed jar under gentle steam pressure, all the vital nutrients, rich minerals, and natural juices remain trapped right inside the jar instead of being lost in steam or cooking water. The resulting meat is amazingly tender, light on the stomach, and very easy to digest, making it an excellent food choice for young children, elderly family members, and fitness enthusiasts alike.
The taste profile of home canned chicken is far superior to anything you can buy in a store or even make in a standard boiling pot. Cooking the chicken under pressure allows the garlic, black pepper, and thyme to deeply infuse into every muscle fiber of the meat over time. The meat turns out so delicate and tender that it literally falls apart at the gentle touch of a spoon or fork. Furthermore, the natural juice that gathers at the bottom of the jar creates a rich, gelled gelatinous broth packed with natural collagen, which is fantastic for joint health, skin elasticity, and gut wellness. It combines fantastic flavor with incredible wholesome goodness in every single bite.
Extra Tips for Better Taste
To take your home canned chicken from great to extraordinary, consider experimenting with simple, creative flavor variations before you seal your jars. Adding a couple of whole black peppercorns, a pinch of red pepper flakes, or a tiny slice of fresh jalapeño pepper to each jar will impart a subtle, warm kick of heat that tastes amazing in future Mexican inspired dishes like enchiladas or tacos. A small piece of fresh rosemary, a slice of sweet yellow onion, or a tiny pinch of smoked paprika can also elevate the savory notes of the chicken, making it smell and taste like slow roasted chicken right out of the oven.
Another wonderful tip for maximizing flavor is to use a combination of both dark and light meat in every jar. Mixing chicken breast with boneless chicken thighs adds extra natural fats and rich flavor to the jar, ensuring that the meat remains moist and rich even after long storage. If you prefer using the hot pack method, consider making a rich homemade stock using roasted chicken bones, carrots, celery, and onions to pour over the chicken instead of plain water. This extra step injects incredible depth of flavor and creates an insanely delicious soup base right inside your jar.
Always remember that quality ingredients yield the best tasting final product. Choose pasture raised or high quality fresh chicken whenever possible, as healthier birds have better muscle structure and far superior natural flavor. Never use frozen chicken directly for raw packing without thawing it completely first, as the center of frozen meat will not heat up fast enough during canning to guarantee safe temperature levels. Finally, let your sealed jars rest in your pantry for at least two to three weeks before opening the first one. This resting period allows the subtle herb seasonings and garlic to fully permeate and mature inside the chicken.
Final Thoughts
Canning your own homemade chicken is a rewarding kitchen skill that brings incredible convenience, financial savings, and superior health benefits into your daily life. Having a pantry stocked with jars of tender, flavorful meat makes preparing homemade dinners an effortless joy rather than a stressful chore at the end of a busy day. It connects you to a timeless tradition of self reliance and wholesome cooking that you can feel truly proud of sharing with your loved ones. Once you experience the wonderful convenience and mouthwatering taste of home preserved chicken, it will quickly become a cherished routine in your culinary life. Enjoy the process, take pride in your delicious food storage, and happy canning to you and your family.
Nutrition Details
Here is the detailed estimated nutritional breakdown for one serving of this delicious home canned chicken.
| Nutrient Component | Amount Per Serving (1/2 Pint / 4 ounces) |
| Total Calories | 165 kcal |
| Protein | 26 grams |
| Total Fat | 5 grams |
| Saturated Fat | 1.5 grams |
| Cholesterol | 75 milligrams |
| Sodium | 290 milligrams |
| Carbohydrates | 0 grams |
| Dietary Fiber | 0 grams |
| Sugars | 0 grams |
| Vitamin D | 0.2 micrograms |
| Calcium | 15 milligrams |
| Iron | 1.1 milligrams |
| Potassium | 280 milligrams |
Disclaimer
This article is provided for general educational, informational, and culinary inspiration purposes only. Every person’s body, nutritional requirements, and health conditions are unique, so individual results from consuming specific foods may vary. When preserving food at home, always follow the latest official food safety guidelines from certified agricultural extension services and your local public health authorities to ensure proper safety. Always inspect your canned jars for proper seal integrity, unusual odors, or signs of spoilage before eating. Consult with a qualified healthcare professional or certified dietitian if you have specific dietary restrictions, health concerns, or medical conditions.