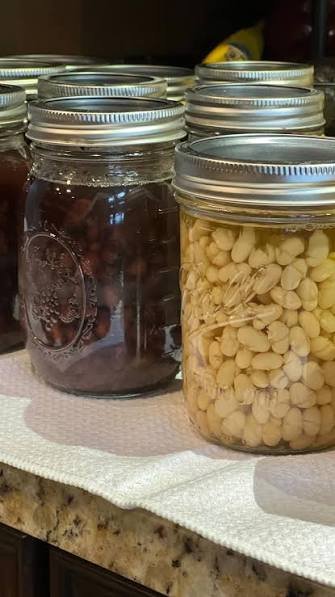
Canning dried beans at home is one of the most rewarding kitchen projects you will ever try. This simple method turns hard, inexpensive dry beans into tender, flavor packed pantry staples ready to use anytime. When you preserve your own food in glass jars, you gain full control over what goes into your meals. You get to choose the exact amount of salt, add your favorite natural herbs, and completely skip the artificial preservatives found in store bought cans. Home canned beans retain a wonderfully firm yet creamy texture that beats commercial products every single time. Beyond the incredible quality improvement, learning this skill gives you a deep sense of self reliance. Your pantry shelves will line up with beautiful glass jars full of rich nourishment, making quick weeknight meals simpler than ever before.People absolutely love home preserved food because it delivers unmatched taste and ultimate convenience. Opening a store bought tin often means dealing with metallic flavors, excessive sodium, and mushy textures that ruin good dishes. In contrast, home preserve methods allow the natural earthy flavors of pinto, black, kidney, or navy beans to shine bright. Home cooks also adore the incredible cost savings that come with buying dry legumes in bulk packages. A single large sack of dry legumes costs very little money yet yields dozens of pint jars filled with delicious food. When you harvest this goodness in your own kitchen, dinner preparation becomes effortless. You can pop open a jar to make quick chili, fresh salads, dips, or tacos without waiting hours for raw ingredients to boil on the stove.Making your own preserve jars fits perfectly into many lifestyle goals, whether you focus on fitness, budget management, or emotional comfort. From a health and fitness viewpoint, legumes stand out as powerhouses packed with plant protein, slow digesting carbohydrates, and dietary fiber. Having pre cooked high protein options sitting on your shelf helps you stick to healthy eating habits even during extremely busy workweeks. From an emotional perspective, there is a cozy, grounding joy in filling your pantry with bright home made food. Cooking up big batches during a cool weekend afternoon fills your home with warm, inviting aromas. It connects you to classic traditional cooking methods that families have relied on for generations to stay well fed through every season.Starting this preserving journey is surprisingly easy once you learn the basic safety rules. Many beginners feel nervous about using pressure processing equipment, but modern home tools make the process smooth and reliable. By taking time to properly rehydrate, boil, and process your legumes, you guarantee both incredible flavor and safety. This guide walks you through every detail so you can build total confidence in your kitchen. You will learn how to select the best dry produce, prepare your canning equipment, and store your finished jars for long term pantry success. Let us jump into the simple ingredients you need to start filling your pantry today.Ingredients You Will NeedTo preserve dry legumes successfully, you only need a few simple, natural ingredients. Make sure your dry legumes are fresh and free of debris for the best results.Dry Beans: two pounds of dry black, pinto, kidney, or navy beansWater: sixteen cups of clean, filtered water for soaking and boilingCanning Salt: four teaspoons of pure canning salt or sea salt without additivesBoiling Water: eight to ten cups of boiling water to fill jars before closingStep by Step MethodStep 1: Sorting and WashingBegin by pouring your dry legumes out onto a clean baking sheet or large tray. Look through them carefully with your hands to remove small stones, bits of dirt, or damaged pieces. Once sorted, transfer them into a large colander and rinse thoroughly under cool running tap water.Step 2: Hydrating the LegumesTransfer your washed produce into a large stockpot and cover them with plenty of cool water. Make sure the water level sits at least three inches above the top surface. Allow them to soak for eight to twelve hours, or overnight, so they absorb liquid and expand fully.Step 3: Quick BoilingAfter soaking, drain away the soaking liquid and rinse the expanded legumes once more. Return them to the stockpot, add fresh water until fully covered, and bring the pot to a rolling boil over medium high heat. Lower the heat slightly and simmer gently for thirty minutes.Step 4: Equipment PreparationWhile your food simmers, wash your glass jars, metal lids, and screw bands in hot soapy water. Rinse everything well and keep your glass jars warm by resting them in hot water. Keeping jars hot prevents glass breakage when hot liquid is added later.Step 5: Jar PackingUse a slotted spoon to transfer the hot cooked legumes into your warm glass jars. Fill each jar leaving one inch of empty space at the very top, which is called headspace. Add one half teaspoon of canning salt to pint jars, or one full teaspoon to quart jars.Step 6: Adding Hot LiquidLadle hot boiling water over the legumes in each jar. Maintain that crucial one inch headspace at the top so the contents have space to expand. Insert a clean bubble remover tool or plastic utensil down the inner sides of the jar to release trapped air bubbles.Step 7: Sealing the JarsWipe the top rims of every glass jar using a clean, damp cloth to remove any food residue or salt grains. Place a warm metal lid flat on top of each jar rim. Screw the metal bands on until they are fingertip tight, avoiding overtightening.Step 8: Pressure ProcessingPlace your filled jars into a pressure canner containing two to three inches of hot water. Lock the canner lid tightly and let steam vent freely for ten minutes before placing the weight on. Process pint jars for seventy five minutes or quart jars for ninety minutes at ten pounds of pressure, adjusting for your altitude if necessary.Step 9: Cooling and Testing SealsOnce the processing time ends, turn off the heat source and let the pressure drop naturally to zero. Carefully remove the lid away from your face, take out the hot jars with a jar lifter, and place them on a towel. Let them cool undisturbed for twenty four hours, then check that all lids have popped down securely to confirm a strong seal.Why This Recipe Is SpecialThis home processing method stands out because it brings superior quality, safety, and nutrition right to your home table. Store bought options often contain hidden chemical stabilizers, extra starch, and massive amounts of unnecessary salt. By preserving your own food, you decide every single component that goes into your body. Freshly prepared legumes retain higher levels of naturally occurring minerals, vitamins, and complex carbohydrates that boost your body energy levels throughout the day.Another incredible benefit is the outstanding texture and deep flavor profile achieved through pressure cooking inside glass jars. The slow pressure processing allows the simple salt and clean water to penetrate deep into every single legume. Instead of ending up with watery sauce or mushy bottoms, you get whole, plump morsels that maintain their shape beautifully in soups, rice dishes, and stews.From an economic perspective, this strategy protects your household budget against rising grocery store prices. Purchasing raw dry food in bulk gives you maximum value per pound compared to pre packaged tins. Having rows of ready to eat jars resting in your dark pantry saves precious cooking time on busy nights, helping you avoid ordering expensive takeout meals when you feel exhausted.Extra Tips for Better TasteTo lift the flavor of your jars from plain to extraordinary, try adding custom aromatics before sealing. You can drop one small peeled garlic clove or a small piece of dried bay leaf directly into the bottom of each pint jar. These simple additions infuse gentle savory notes into the liquid during the long pressure processing cycle.Another creative idea involves swapping plain water for rich, light broth when filling your jars. Low sodium vegetable broth or light chicken stock adds a wonderful layer of richness without overpowering the natural taste of your legumes. Just ensure the stock is boiling hot when poured over the food to maintain safety standards.If you enjoy a hint of subtle heat, add a slice of fresh jalapeño or a tiny pinch of red pepper flakes to each glass container. The pressure environment spreads that warmth evenly throughout the liquid. Remember to always keep spice additions light so your finished food remains versatile enough for many different recipes later on.Final ThoughtsPreserving dry legumes at home is a truly fulfilling kitchen activity that combines classic practical skills with modern home eating goals. Seeing those clean glass jars lined up neatly on your pantry shelves brings immense satisfaction and peace of mind. You save money, eat cleaner, and simplify your meal planning all at once. Give this simple preserving method a try this weekend, and enjoy the wonderful comfort of having fresh, wholesome food ready whenever you need it.Nutrition DetailsHere is an estimated breakdown of the nutritional content present in home preserved legumes per serving size.NutrientAmount Per Serving (1/2 Cup)Calories115 kcalProtein8 gramsTotal Carbohydrates20 gramsDietary Fiber7 gramsTotal Fat0.5 gramsSodium150 mgPotassium350 mgIron2 mgDisclaimerEveryone’s body is unique, and individual dietary needs or health conditions vary from person to person. The nutrition figures provided above are general estimates based on standard cooking ingredients. When preserving food at home, always follow tested pressure canning safety guidelines to prevent foodborne illness and ensure optimal quality for your family.