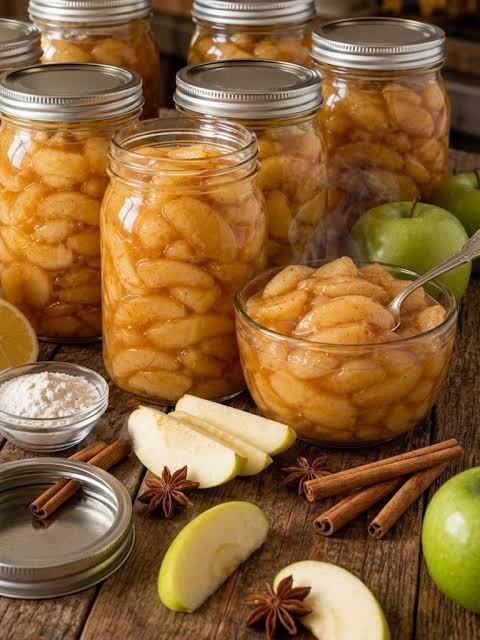
Canning Grandma Apple Pie Filling is a wonderful tradition that brings the warm comfort of a classic homemade dessert straight into your kitchen pantry. This simple recipe allows you to preserve fresh, crisp apples in a rich, sweet, and aromatic spiced syrup so that you can bake an authentic homemade pie whenever you crave one. When you make this filling from scratch, you are taking complete control over every single ingredient that goes into your jars, avoiding artificial colors, harsh chemical preservatives, and overly processed sugars often found in store bought cans. The whole process is designed to capture the wonderful flavors of harvest season at their peak while keeping the preparation method very simple and beginner friendly. Once you learn how to process these jars correctly, you will have a pantry stocked with delicious golden fruit ready to be transformed into pie fillings, crisp toppings, or warm breakfast treats in just a few minutes.
People around the world love this old fashioned recipe because it offers an unbeatable blend of convenience, deep nostalgia, and rich flavor that simply cannot be matched by commercial canned goods. There is something deeply satisfying about opening a mason jar sealed with sweet cinnamon scented fruit that smells like a cool autumn afternoon inside your grandmother’s cozy kitchen. Homemade pie filling preserves the natural texture of the fruit so that every slice of your pie stays tender and bite sized rather than turning into a watery or mushy mess. Families love having these ready to use jars on hand because they cut pie baking time down to a fraction of what it usually takes, making weekend baking or holiday meal preparation completely stress free. Sharing these beautiful glass jars as gift items with friends, family members, or neighbors is also a popular way to spread warmth and kindness through homemade food.
There are so many wonderful reasons and special occasions to start canning your own apple pie filling at home today. If you visit a local orchard during the peak harvest season, you will often find fresh apples sold in huge bulk quantities at very low prices, making preserving an economical way to enjoy healthy fruit all year long. Beyond saving money, making this pie filling triggers powerful feelings of comfort and joy that make your home feel inviting and warm during cold winter days. Fitness conscious individuals and health conscious parents also appreciate this recipe because they can adjust sweetness levels or choose whole natural ingredients that align better with their personal dietary goals. Whether you want to prepare ahead for busy holiday gatherings or simply want a quick way to serve a warm wholesome dessert to your family on a weeknight, this recipe delivers great results every time.
Taking on this food preservation project gives you an immense sense of personal pride as you master a classic culinary skill that has been passed down through generations. You do not need to be an expert chef or have decades of kitchen experience to achieve perfectly sealed, beautiful jars of pie filling on your very first try. The process brings friends and family together as kids or partners can help wash, peel, and slice the fruit while the sweet syrup bubbles gently on the stove. By preserving your own food, you also reduce kitchen waste and build a more self reliant household that values good wholesome eating habits. Every single bite of pie made from this golden syrup and spiced fruit will remind you of the care and love you put into preparing it yourself.
Ingredients You Will Need
6 pounds fresh apples such as Granny Smith, Honeycrisp, or Gala 4 and 1/2 cups water 2 and 1/2 cups granulated white sugar 1 cup Clear Jel canning starch 1 tablespoon ground cinnamon 1 teaspoon ground nutmeg 1/2 teaspoon ground allspice 1/2 cup bottled lemon juice 1 teaspoon salt
Step by Step Method
Step 1: Preparing Your Equipment Gather six quart sized glass canning jars along with their matching lids and metal bands. Wash all your glass jars, new lids, and metal bands thoroughly in warm soapy water, then rinse them completely with clean water. Place the clean jars inside a large water bath canner filled with hot water and keep them hot on low heat so that the glass does not crack when hot filling is added later.
Step 2: Washing and Prepping the Fruit Wash all six pounds of fresh apples under cold running water to remove any dust or dirt. Use a sharp vegetable peeler to peel away all the skin from each fruit completely. Cut the peeled fruit into neat quarters, remove the central core and seeds, and slice the fruit into uniform slices that are about one half inch thick so they cook evenly.
Step 3: Treating Fruit to Prevent Browning Fill a large mixing bowl with eight cups of cold water and add two tablespoons of bottled lemon juice or ascorbic acid powder to create a simple bath. As you finish slicing your fruit pieces, drop them immediately into this bath to keep them from turning brown from air exposure. Leave the fruit in this mixture while you prepare the liquid cooking steps.
Step 4: Blanched Cooking of the Fruit Bring a large pot of plain water to a rolling boil on your stove top. Drain your fruit slices from the browning bath and submerge them into the boiling water for exactly one minute to blanch them. Remove the fruit slices using a slotted spoon and keep them warm in a covered bowl so they stay tender and hot.
Step 5: Mixing the Dry Syrup Base In a large stainless steel pot, combine the white sugar, Clear Jel canning starch, ground cinnamon, ground nutmeg, ground allspice, and salt. Whisk all these dry ingredients together thoroughly while still dry to ensure that the starch is evenly distributed so it will not form lumps when liquid is added.
Step 6: Cooking the Sweet Cinnamon Syrup Pour four and one half cups of clean water into the dry spice mixture while continuing to whisk vigorously. Place the pot over medium high heat and bring the liquid to a steady boil, stirring continuously as it warms up. Cook until the mixture thickens significantly and begins to bubble clearly across the surface.
Step 7: Adding Lemon Juice and Fruit Once the syrup is thick and bubbling, pour in the one half cup of bottled lemon juice and whisk continuously for one full minute to blend it completely. Turn off the burner heat immediately. Add all your warm blanched fruit slices into the hot syrup pot and gently fold everything together using a large spoon until every slice is coated.
Step 8: Filling the Glass Jars Carefully remove your hot canning jars from the hot water bath using jar tongs and set them on a clean kitchen towel. Ladle the hot fruit and syrup mixture into each warm jar, leaving exactly one inch of empty space at the top of the jar rim.
Step 9: Removing Air Bubbles Insert a plastic bubble remover tool or a smooth silicone spatula down into the sides of each filled jar to release any trapped air bubbles. Recheck the empty space at the top and add a little more hot filling or syrup if necessary to maintain that precise one inch space.
Step 10: Cleaning Rims and Sealing Jars Dip a clean paper towel in warm water or vinegar and wipe the top glass rim of every jar completely clean so no sugar residue interferes with the seal. Center a clean lid over each jar rim and screw the metal band down gently until it is fingertip tight, avoiding over tightening.
Step 11: Water Bath Processing Place the sealed jars back into your large water bath canning pot filled with hot water, ensuring that at least two inches of water covers the jar tops completely. Put the pot lid on and bring the water to a full rolling boil. Process quart jars in boiling water for thirty minutes, adjusting time if you live at a high altitude.
Step 12: Cooling and Storage When processing time is finished, turn off the stove burner, remove the pot lid, and let jars rest in the hot water for five minutes. Carefully remove jars with jar tongs and set them upright on a towel in a draft free area to cool undisturbed for twenty four hours. Listen for the satisfying popping sound that indicates a proper vacuum seal, then store sealed jars in a dark cool pantry.
Why This Recipe Is Special
This traditional canning recipe stands out because it offers a perfect balance of deep flavor, safety, and physical comfort. Using Clear Jel canning starch guarantees that your pie filling remains thick, smooth, and clear without breakdown during long term storage or oven baking. Unlike commercial pie fillings loaded with high fructose corn syrup and artificial food colors, this homemade version lets the natural crisp flavor of fresh apples shine through warm spices like cinnamon and nutmeg.
Preserving fruit at home also supports a healthy lifestyle by allowing you to reduce refined sugars if desired and eliminate synthetic preservatives from your home pantry. Cooking with real whole fruit ensures you get natural dietary fiber and essential plant nutrients while satisfying your dessert cravings in a wholesome way. Having high quality jars ready in your kitchen saves precious meal preparation time, helping you reduce daily stress while treating your family to traditional homemade goodness.
Extra Tips for Better Taste
Use a mixture of sweet and tart apple varieties such as Granny Smith combined with Honeycrisp or Jonathan to create a much more complex and delicious flavor profile.
Always use bottled lemon juice rather than fresh lemons because bottled juice guarantees the precise uniform acidity level required for safe long term home food canning.
Add a small pinch of ground ginger or cardamom to the spice mixture if you want to give your pie filling an extra layer of cozy warmth and unique aroma.
Never substitute regular cornstarch or flour for Clear Jel because standard starches can break down into watery liquids or create safety issues inside canned jars.
Store your finished cooled jars in a cool dark pantry away from direct sunlight to keep the bright golden color and crisp fruit texture intact for up to a full year.
Final Thoughts
Canning your own pie filling is a simple, satisfying, and rewarding culinary journey that fills your kitchen with warmth and provides quick delicious meals for months to come. With just a few basic ingredients and straightforward techniques, you can transform fresh seasonal fruit into convenient pantry staples that your entire family will cherish. Give this classic Grandma recipe a try this season, and enjoy the magical taste of homemade apple pie whenever you like.
Nutrition Details
| Item / Metric | Details Per Serving (Approx. 1/3 Cup) | Full Batch Total (6 Quarts) |
| Calories | 120 kcal | 2880 kcal |
| Total Carbohydrates | 30 g | 720 g |
| Dietary Fiber | 2 g | 48 g |
| Sugars | 24 g | 576 g |
| Protein | 0 g | 2 g |
| Total Fat | 0 g | 1 g |
| Saturated Fat | 0 g | 0 g |
| Sodium | 35 mg | 840 mg |
| Potassium | 110 mg | 2640 mg |
| Calcium | 12 mg | 288 mg |
Disclaimer
Everyone has a unique body with different health needs, dietary restrictions, and physical requirements. Nutritional results, caloric values, and personal health benefits may change depending on the exact fruit varieties used, specific brand measurements, and individual metabolic rates. Please consult with a qualified health professional or doctor if you have specific health conditions, diabetes concerns, or special dietary needs before consuming sweet food products.