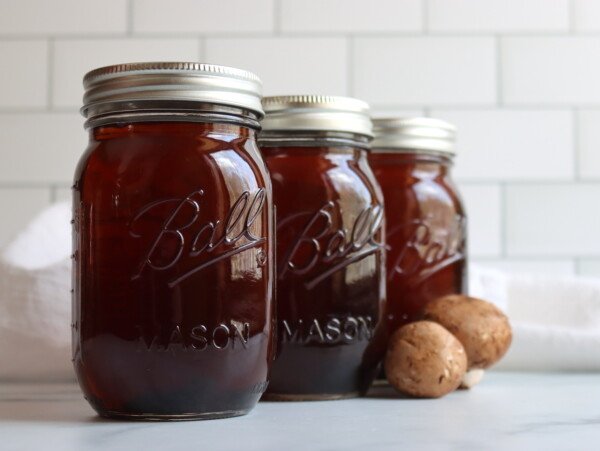
Making your own canned beef broth at home is one of the most rewarding kitchen projects you can ever start. This process is all about taking simple beef bones, clean water, fresh vegetables, and gentle herbs, then simmering them together slowly until all the rich flavors and natural goodness come out into a beautiful golden liquid. Home canning allows you to preserve this delicious soup base in glass jars so that it stays fresh on your pantry shelf for many months without needing a freezer. When you open a jar of homemade stock, you immediately notice the deep aroma and rich color that store bought cartons simply cannot match. It gives you complete control over every single ingredient that goes into your body, which means no artificial preservatives, no extra chemicals, and no hidden food dyes. Learning this skill turns basic ingredients into a valuable kitchen asset that will save you time and money every single week.
People across the world absolutely love making and storing their own beef broth because the taste is so much better than anything you can buy in a grocery store. Commercial versions often taste like salty water with artificial flavoring, but homemade broth has a deep, savory meat flavor with natural body and rich warmth. Home cooks adore having a shelf stable supply ready to go whenever a recipe calls for a flavorful liquid base. You do not have to wait for meat to thaw or spend money on expensive shop bought broth boxes during busy weeknight cooking. There is also a wonderful sense of pride that comes from filling your pantry shelves with shiny jars of clear, dark broth that you made entirely with your own hands. It transforms simple everyday cooking into a joyful experience because every soup, stew, or gravy you make starts with a powerful foundation of pure taste.
There are so many emotional, comforting, and health related reasons to start canning your own broth today. On chilly winter days or during times when you feel tired or unwell, a hot mug of warm beef broth feels like a comforting hug for your soul. For fitness lovers and people following healthy lifestyle plans, broth is loaded with natural proteins like collagen and gelatin which support strong joints, healthy skin, and good digestion. It is naturally low in calories while being very satisfying, making it a great option for light meals or midday energy boosts. From a practical standpoint, making stock is a wonderful way to use up leftover meat bones and vegetable scraps that might otherwise go into the trash bin. Saving food scraps and turning them into nourishing stock connects you to traditional home cooking methods while helping you manage your family budget wisely.
Starting this canning journey gives you a deep sense of self reliance and kitchen confidence that will stay with you forever. Every step of the way, from roasting the bones in your oven to watching the jars seal on your counter, is deeply satisfying. You will find that cooking meals becomes much faster and more enjoyable when you can simply walk to your pantry and pull out a jar of liquid gold. Your friends and family will notice the amazing difference in your soups, sauces, rice dishes, and casseroles right away. It is a classic kitchen tradition that combines great taste, fantastic health benefits, smart home management, and pure cozy comfort. Once you taste the incredible quality of fresh canned beef broth made in your own kitchen, you will never want to go back to store bought options ever again.
Ingredients You Will Need
To make a large batch of rich beef broth for canning, gather the following ingredients with their clear measurements:
- 5 pounds of beef marrow bones, knuckle bones, or meaty soup bones
- 2 pounds of beef shank or beef stew meat for extra rich flavor
- 4 gallons of cold clean water
- 3 large yellow onions, washed and cut into big quarters with skins left on
- 6 large whole carrots, washed and chopped into large two inch pieces
- 6 stalks of fresh celery, washed and cut into large two inch pieces
- 1 whole head of garlic, sliced horizontally across the middle
- 4 whole bay leaves
- 1 tablespoon of whole black peppercorns
- 4 fresh sprigs of thyme
- 4 fresh sprigs of parsley
- 2 tablespoons of apple cider vinegar
- 2 teaspoons of salt, optional if you want low sodium broth
Step by Step Method
Step 1: Roast the Bones and Meat
Heat your home oven to 425 degrees Fahrenheit. Place all five pounds of beef bones and two pounds of beef meat on a large baking sheet in a single layer. Roast them in the hot oven for about 45 minutes to one hour. Turn the bones halfway through cooking so all sides become dark brown. Roasting is essential because it creates a deep flavor and rich color.
Step 2: Transfer to a Large Stockpot
Carefully remove the roasted bones and meat from the oven using tongs and place them into a very large stockpot. Pour a cup of hot water onto the warm baking sheet and scrape up all the delicious browned bits stuck to the pan. Pour those juices directly into your stockpot as well.
Step 3: Add Vegetables, Water, and Vinegar
Add the quartered onions, cut carrots, celery stalks, and sliced garlic head into the pot with the bones. Pour in two tablespoons of apple cider vinegar along with four gallons of cold clean water. The gentle acid in the vinegar helps draw out calcium and collagen from the deep inside of the beef bones.
Step 4: Add Herbs and Simmer Slowly
Place the bay leaves, black peppercorns, fresh thyme, and fresh parsley into the pot. Turn the stove heat to high and bring the liquid just to a boil. As soon as it boils, turn the heat down to low. Let the broth simmer very gently with the lid partially on for at least 8 to 12 hours. Small bubbles should rise slowly to the surface.
Step 5: Strain the Rich Broth
After simmering for hours, turn off the heat. Use a slotted spoon to remove the large bones and vegetable pieces. Pour the hot liquid through a fine mesh strainer lined with cheesecloth into another large pot or container. Discard the spent bones and cooked vegetables.
Step 6: Cool and Remove Excess Fat
Let the strained broth cool down, then place it in your refrigerator overnight. By the next morning, a solid layer of white fat will form at the very top of the pot. Use a spoon to lift off this solid fat layer, leaving pure clear liquid stock underneath. Reheat the broth until it is hot before canning.
Step 7: Prepare Your Pressure Canner and Jars
Wash your canning jars, lids, and rings in hot soapy water and rinse them thoroughly. Keep the jars warm in warm water so they do not break when hot broth is added. Fill your pressure canner with two to three inches of water and start heating it gently on the stove.
Step 8: Fill the Jars
Pour the hot beef broth into your warm jars using a funnel. Leave exactly one inch of space at the top of each jar, which is known as headspace. Wipe the top rim of each jar with a clean damp paper towel to ensure no oil or food remains. Place a warm lid on top and screw the metal band on until it is fingertip tight.
Step 9: Process in the Pressure Canner
Place your filled jars carefully inside the pressure canner. Lock the canner lid into place. Turn the heat up and let steam escape from the vent pipe for ten minutes continuously. Place the pressure regulator or weight on the vent pipe. Bring the pressure up to 10 pounds for weighted gauges or 11 pounds for dial gauges, adjusting for your local altitude if necessary.
Step 10: Process Time and Cooling
Process pint jars for 20 minutes or quart jars for 25 minutes at the correct pressure. Once the processing time is complete, turn off the stove heat completely. Let the canner cool down naturally until the pressure drops all the way back to zero on its own. Never force the canner to cool down fast.
Step 11: Final Jar Check and Storage
Carefully open the canner lid away from your face. Lift the hot jars out using a jar lifter and set them on a towel on your counter. Let them sit untouched for 12 to 24 hours. You will hear satisfying popping sounds as the jars seal. Press the center of each lid to ensure it is firm and sealed. Store your processed jars in a cool, dark, dry pantry.
Why This Recipe Is Special
This homemade beef broth recipe stands out because it offers unmatched taste alongside fantastic health benefits. Unlike shop bought cartons that rely on artificial flavors and heavy salt, this recipe relies on real whole food ingredients. The long simmer extracts natural collagen, glucosamine, and minerals like calcium and magnesium directly from the beef bones. These natural elements help support your joint flexibility, reduce body inflammation, strengthen hair and nails, and nourish the lining of your gut.
Another reason this recipe is special is its high protein content and low carbohydrate profile. It fits wonderfully into modern clean eating routines like keto, paleo, and low carb diets. It satisfies hunger between meals without adding extra sugar or processed chemicals. The flavor profile is exceptionally balanced because roasting the bones creates a deep savory note, while carrots and onions add a touch of natural sweetness. Having this rich stock ready in your pantry elevates every simple meal you make at home.
Extra Tips for Better Taste
- Roast your vegetables alongside the beef bones for twenty minutes to unlock deeper caramel flavors.
- Use a mixture of bone types, combining marrow bones for rich taste with knuckle bones for gel creation.
- Keep the onion skins on while simmering because they give the broth a beautiful amber yellow color.
- Never let your broth boil violently, as gentle simmering keeps the stock crystal clear instead of cloudy.
- Add a small piece of star anise or a tiny dash of clove for a subtle aroma without making it taste like spice mix.
- Do not add too much salt before canning, because you can always add salt later when you use the broth in final recipes.
- Use high quality water like filtered water or spring water so no chlorine taste interferes with the beef flavor.
Final Thoughts
Canning your own beef broth is a wonderful kitchen skill that brings incredible comfort, nourishment, and convenience straight to your home. It connects you to classic home cooking traditions while filling your pantry with bright, delicious jars of pure goodness. Once you taste soups made with your homemade stock, you will feel proud of the work you put into every jar. Take your time, follow the safety steps for pressure canning carefully, and enjoy the delicious rewards of your kitchen efforts for months to come.
Nutrition Details
Here is an estimated nutrition breakdown for one cup of homemade beef broth:
| Nutrient Category | Amount Per Serving |
| Serving Size | 1 cup (8 fluid ounces) |
| Calories | 45 |
| Total Fat | 1.5 grams |
| Saturated Fat | 0.5 grams |
| Sodium | 150 milligrams |
| Total Carbohydrates | 1 gram |
| Dietary Fiber | 0 grams |
| Sugars | 0 grams |
| Protein | 7 grams |
| Calcium | 25 milligrams |
| Potassium | 220 milligrams |
Disclaimer
This recipe and nutritional information are provided for general educational purposes only. Every person has unique dietary needs, health conditions, and body requirements, so personal results from consuming homemade bone broth may vary. Always make sure to follow verified food safety standards and pressure canning guidelines precisely to prevent spoilage. If you have specific health questions, low sodium requirements, or medical concerns, please consult with a qualified doctor or professional dietitian.