Sourdough baking is a wonderful journey that brings the ancient art of natural bread making right into your cozy home kitchen. At the very heart of this magical baking process lies a crucial stage known as bulk fermentation, which is simply the primary rise where your dough develops its flavor, structure, and air bubbles. This special recipe guide focuses on mastering sourdough bulk fermentation to help you bake a beautiful loaf of fresh bread from scratch using simple ingredients and simple techniques. When you mix active wild yeast sourdough starter with flour, water, and sea salt, the natural fermentation process begins to work its slow magic. Throughout this essential stage, wild yeast and beneficial bacteria consume the sugars present in the wheat flour, producing carbon dioxide gas and organic acids that make the dough expand while building complex flavor profiles. Understanding this initial fermentation step is the ultimate secret to moving from dense, flat loaves to light, airy bread with magnificent open crumbs and crisp crusts. Beginners often feel intimidated by sourdough baking because it relies on living organisms rather than commercial instant yeast, but learning this core phase will give you total confidence in your kitchen.
People all over the world fall deeply in love with sourdough bread making because it connects us to real food and mindful kitchen traditions. There is an unmatched sense of pride that comes from turning three basic budget friendly ingredients into a magnificent artisanal loaf that rivals the finest bakery offerings. Bakers treasure the peaceful ritual of checking on their rising dough, performing gentle stretches and folds, and watching the plain mixture transform into a smooth, pillow like mass filled with active fermenting bubbles. Beyond the delightful process itself, the finished bread offers incredible depth of flavor with a pleasant tanginess, a beautiful golden crust, and a delightfully chewy interior texture that store bought bread simply cannot duplicate. Families love gathering around the kitchen counter to share warm slices with rich yellow butter, knowing that the loaf was made with love, patience, and zero artificial preservatives. The satisfying journey of nourishing your loved ones with wholesome homemade bread creates lasting memories and turns a basic weekly task into a joyful hobby that brings people together.
There are so many wonderful reasons to embrace sourdough baking, whether you are seeking emotional comfort, unbelievable taste, or healthier nutrition for your daily routine. Baking sourdough provides a calming creative outlet after a busy work week, allowing you to slow down, disconnect from digital screens, and engage all your senses in a rewarding hands on craft. From a flavor perspective, the slow sourdough bulk fermentation process breaks down complex starches and creates rich aromatic compounds that elevate simple sandwiches, morning toasts, and dinner sides into gourmet experiences. Fitness enthusiasts and health conscious individuals especially appreciate sourdough bread because the natural fermented wild yeast process breaks down gluten proteins and phytic acid, making the nutrients far easier for your human digestive system to absorb smoothly. If traditional commercial white bread makes you feel bloated or sluggish, authentic long fermented sourdough offers a gentle alternative that supports good gut health without compromising on delicious taste. Preparing a fresh batch on a quiet weekend morning sets a wonderful tone for your week, filling your living space with warm, irresistible bakery aromas that welcome everyone home.
Mastering sourdough bulk fermentation is truly the most rewarding skill you can develop in your baking adventure, as it forms the solid foundation for all your future bread creations. By learning how to recognize when your dough has fermented just enough, you unlock the ability to bake consistent, high quality loaves every single time regardless of changing kitchen temperatures. The time you invest in observing the subtle changes in your dough teaches you patience and helps you build a strong intuitive connection with natural food preparation. Every step of this process offers a learning opportunity, allowing you to fine tune your methods until you achieve your absolute dream crumb structure and crust color. As you share your golden baked achievements with friends, neighbors, and family members, you will discover that homemade sourdough is far more than mere food, it is a heartfelt expression of care and hospitality. Embracing this classic baking approach allows you to step away from overly processed industrial foods and take full control over the wholesome ingredients that nourish your body every single day.
Ingredients You Will Need
Active Sourdough Starter You will need one hundred grams of active, bubbly sourdough starter that was fed roughly six to eight hours prior to starting your dough.
Unbleached Bread Flour You will need four hundred grams of high protein unbleached bread flour to provide strong gluten structure for your loaf.
Whole Wheat Flour You will need fifty grams of stone ground whole wheat flour to add a deep earthy flavor and extra nourishment to the bread dough.
Warm Filtered Water You will need three hundreds and thirty5 grams of clean filtered water warmed to roughly twenty seven degrees Celsius or eighty degrees Fahrenheit.
Fine Sea Salt You will need ten grams of fine sea salt to enhance the overall taste and regulate the natural yeast activity during fermentation.
Step by Step Method
Step One Feeding Your Starter Make sure your sourdough starter is fully active and bubbly before you begin your bread project. Feed your starter equal parts flour and water, then place it in a warm location for six hours until it doubles or triples in total volume. You can test readiness by dropping a small spoonful of starter into a bowl of room temperature water, if it floats gently on top, your starter is ready to bake.
Step Two Mixing the Main Ingredients In a large clean glass or ceramic mixing bowl, combine four hundred grams of unbleached bread flour with fifty grams of whole wheat flour. Pour in three hundred and fifteen grams of your warm filtered water, holding back twenty grams of water for later use. Use your hands or a sturdy wooden spoon to mix the flour and water together until all dry white spots disappear and a rough shaggy dough forms.
Step Three The Autolyse Phase Cover your mixing bowl tightly with a clean damp kitchen towel or plastic wrap to prevent the dough surface from drying out. Let the dough rest undisturbed at room temperature for forty five minutes. This rest period is called autolyse, which allows the flour particles to fully hydrate and naturally starts gluten development without any tiring physical kneading required.
Step Four Adding Starter and Salt Uncover your rested dough and pour one hundred grams of active sourdough starter evenly over the top surface. Use your fingers to dimple and press the starter into the dough, then fold the dough over itself several times until fully combined. Sprinkle ten grams of fine sea salt over the top along with the remaining twenty grams of warm water. Squeeze and knead the dough gently for three minutes until the salt is completely dissolved and incorporated.
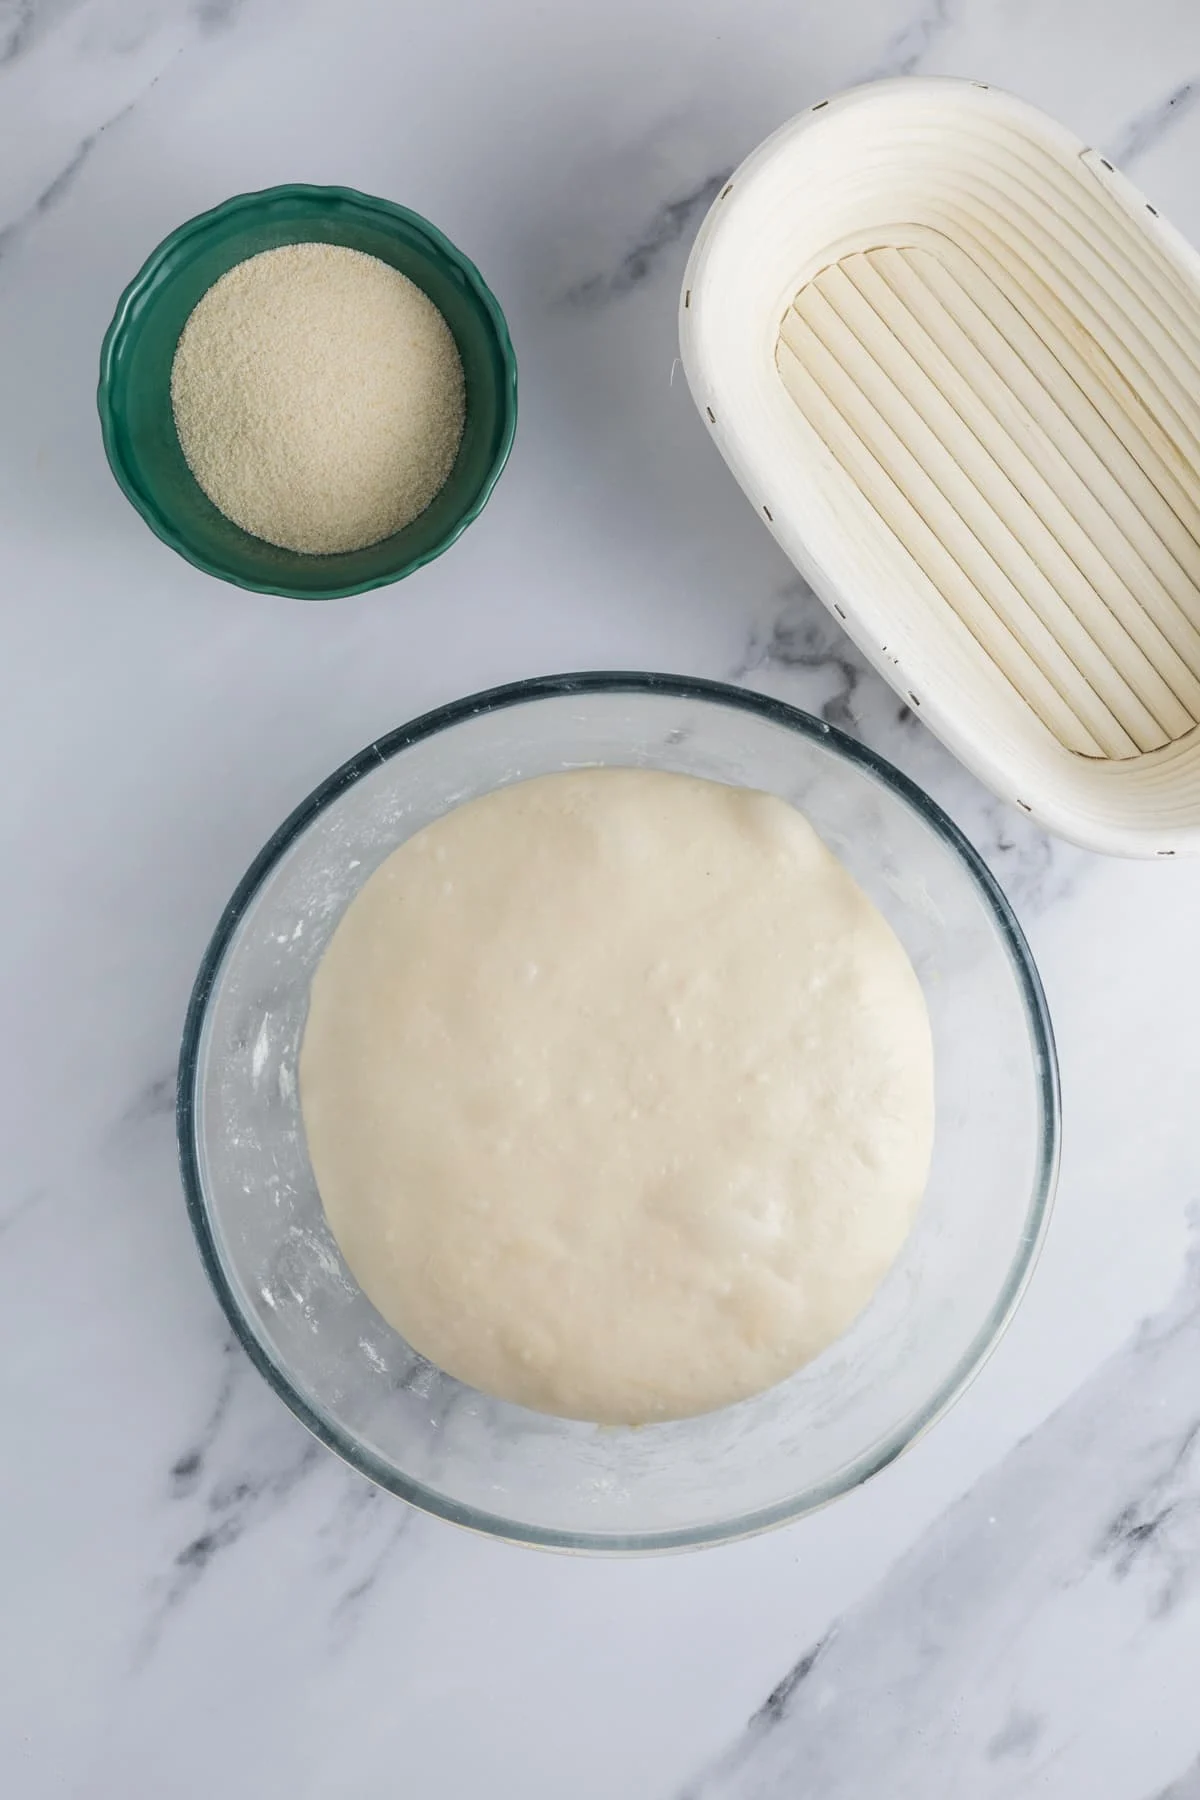
Step Five Beginning the Bulk Fermentation Cover the mixing bowl once again and place it in a warm, draft free location in your kitchen. Ideally, the ambient room temperature should remain between twenty three to twenty six degrees Celsius or seventy four to seventy eight degrees Fahrenheit. This official start marks the beginning of your sourdough bulk fermentation process, which will take roughly four to six hours depending on your exact room climate.
Step Six The First Set of Stretch and Folds After thirty minutes of resting, perform your first set of stretch and folds to build strength in the dough structure. Wet your clean hands with cold water, reach under one side of the dough, stretch it gently upward without tearing, and fold it over the top center. Rotate the bowl ninety degrees and repeat this action on all four sides until the dough forms a neat semi tight ball.
Step Seven Continuing Stretch and Fold Sets Repeat the stretch and fold process three more times, spacing each set thirty minutes apart over the next hour and a half. With every passing set, you will notice the dough becoming noticeably smoother, more elastic, and less sticky to touch. After completing four total sets of stretch and folds, allow the dough to rest completely undisturbed for the remainder of the bulk fermentation duration.
Step Eight Monitoring the Dough Growth Keep a close eye on the visual signs of fermentation rather than relying solely on the clock. Your dough is properly fermented when it has increased in total volume by roughly fifty to seventy percent, displays a slightly domed top surface with smooth edges, and shows visible air bubbles trapped under the surface. If you gently shake the bowl, the fermenting dough should jiggle happily like a firm bowl of gelatin.
Step Nine Pre Shaping the Loaf Lightly dust your clean kitchen counter with a tiny bit of bread flour and gently tip the fermented dough out of the bowl. Use a bench scraper or your flour dusted hands to gently shape the soft dough into a round ball. Leave the shaped dough uncovered on the counter for twenty minutes to rest, allowing the internal gluten tension to relax slightly before final shaping.
Step Ten Final Shaping and Proofing Flour a wooden banneton proofing basket generously with rice flour or unbleached bread flour to prevent sticking. Flip your rested dough ball over, stretch the bottom edge down, and fold it up toward the center. Stretch the left and right sides outward, then fold them over each other like an envelope. Roll the dough up tightly from top to bottom into a smooth log or round, then place it seam side up into your prepared proofing basket.
Step Eleven Cold Fermentation Rest Cover the proofing basket with a clean plastic bag or shower cap to seal in moisture. Transfer the basket directly into your refrigerator for a cold retard phase lasting twelve to sixteen hours. This long cold rest slows down yeast activity while allowing beneficial bacteria to continue developing phenomenal sour flavor, making the dough much easier to score cleanly before baking.
Step Twelve Baking Your Masterpiece Preheat your oven to two hundred and thirty degrees Celsius or four hundred and fifty degrees Fahrenheit with a heavy cast iron Dutch oven placed inside for one full hour. Tip your cold dough onto a sheet of parchment paper, use a sharp razor blade to make a swift one inch deep cut across the top, and carefully lower it into the hot Dutch oven. Cover with the lid, bake for twenty minutes, then remove the lid and bake for another twenty minutes until the crust turns a deep golden brown color. Allow the loaf to cool on a wire rack for two full hours before slicing.
Why This Recipe Is Special
This sourdough bulk fermentation recipe is truly special because it bridges the gap between traditional old world artisan baking methods and simple everyday home cooking. Unlike fast commercial breads that rely on chemical additives, artificial improvers, and heavy doses of processed yeast, this slow fermented method uses pure natural forces to create superior food. The prolonged fermentation period breaks down complex carbohydrates into simpler sugars, resulting in a lower glycemic index loaf that provides sustained, balanced energy throughout your day without causing sharp blood sugar spikes.
From a health perspective, long bulk fermentation completely transforms the digestible nature of wheat grain for the human body. Wild bacteria create lactic acid during fermentation, which neutralizes phytic acid, an anti nutrient naturally found in grain bran that normally blocks your body from absorbing important minerals like iron, zinc, magnesium, and calcium. Furthermore, the natural enzymes break down tough gluten proteins into easy to digest amino acids, allowing many individuals with mild gluten sensitivities to enjoy fresh bread once again without digestive discomfort or inflammation.
The taste profile of a properly fermented sourdough loaf is completely unmatched by standard store bought options. You get a delightful contrast between a crisp, deeply caramelized outer crust and a moist, tender interior packed with rich flavor notes ranging from subtle creaminess to a pleasant, mouth watering tang. Every slice offers a satisfying chew and rich aroma that turns simple meals into memorable culinary experiences. It is a wholesome, economical, and deeply satisfying food that nourishes your body while delighting your senses.
Extra Tips for Better Taste
To achieve an even deeper flavor profile, try replacing fifty grams of your bread flour with dark rye flour or whole grain spelt flour. These alternative ancient grains add delicious nutty undertones and provide extra natural wild yeasts that speed up fermentation and enrich the final bread aroma. You can also experiment with using lukewarm dark beer instead of plain water for a rich, malty twist that pairs beautifully with aged cheddar cheese.
Pay very close attention to your kitchen environment during the bulk fermentation stage. Temperature acts as the main pedal for yeast activity, meaning warmer rooms speed up fermentation while cooler spaces slow it down significantly. If your kitchen is cool, place your covered dough bowl inside an turned off oven with the internal light bulb switched on to create a warm, draft free fermenting chamber that stays at the ideal temperature.
For extra texture and gourmet appeal, consider folding delicious add in ingredients into your dough during the second and third stretch and fold sets. Roasted garlic cloves, chopped fresh rosemary, toasted pumpkin seeds, cubed sharp cheddar, or sun dried tomatoes create incredible flavor pockets throughout the loaf. Always ensure moist ingredients like olives or jalapenos are thoroughly patted dry with paper towels before adding them to avoid adding excess unwanted moisture to your dough balance.
Final Thoughts
Embarking on your sourdough baking adventure is one of the most fulfilling culinary projects you can undertake right in the comfort of your home. While natural fermentation requires a bit of time, patience, and careful observation, the incredible reward of pulling a warm, crackling, golden brown loaf from your own oven makes every single step completely worth it. Do not feel discouraged if your very first attempt is not entirely picture perfect, as every batch teaches you valuable lessons about reading dough texture, temperature, and fermentation cues. Share your fresh homemade loaves proudly with the people you love, enjoy the peaceful baking ritual, and celebrate the simple joy of creating wholesome food from scratch.
Nutrition Details
Here is the full nutrition summary for the entire sourdough bread recipe and per individual slice, based on an average yield of ten thick slices per finished loaf.
Overall Recipe Nutrition Total Calories two thousand and fifty kilocalories Total Carbohydrates four hundred and ten grams Total Protein sixty five grams Total Dietary Fiber twenty two grams Total Fat four grams Total Sodium two thousand three hundred milligrams
Per Serving Nutrition One Slice Calories two hundred and five kilocalories Carbohydrates forty one grams Protein six point five grams Dietary Fiber two point two grams Fat zero point four grams Sodium two hundred and thirty milligrams Iron fifteen percent daily value Calcium two percent daily value
Disclaimer
Please remember that everyone’s body is unique and individual digestive responses or nutritional needs may vary from person to person. While long bulk fermentation significantly reduces gluten content and phytic acid levels, this sourdough bread is not gluten free and is not suitable for individuals with celiac disease or severe wheat allergies. Nutritional calculations provided in this article are close estimates based on standard ingredient values and may fluctuate slightly based on specific brand choices, exact fermentation times, and custom slice sizes. Always consult with a qualified health professional or registered dietitian regarding specific dietary concerns or individual health conditions.