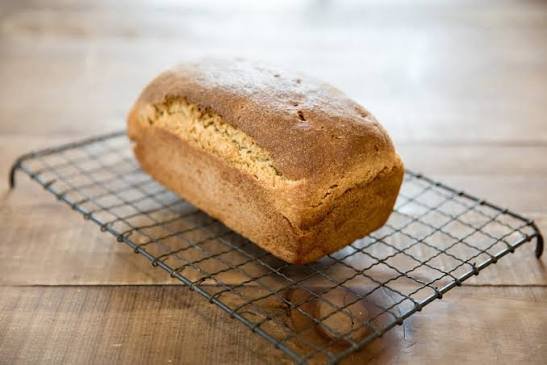
Making your own bread at home is one of the most rewarding kitchen experiences you can ever have. This specific recipe is all about creating a soft, fluffy, and delicious sourdough sandwich bread that is perfect for everyday meals. Unlike traditional artisan sourdough loaves that have a very hard crust and huge air holes inside, this bread is designed specifically for making real sandwiches. It has a nice tight crumb structure so your butter, jam, or sandwich spreads will not leak through the slices. You get the wonderful tangy flavor of natural sourdough ferment combined with the cozy tenderness of classic store bought sandwich bread. It is truly the best of both worlds because you get amazing health benefits without sacrificing the soft texture that children and adults love.
People absolute adore this recipe because it brings pure comfort and joy into the kitchen. There is something deeply satisfying about watching a simple mix of flour, water, and wild yeast transform into a tall golden loaf. The smell that fills your entire home while this bread bakes in the oven is better than any candle you could ever buy. Friends and family will constantly ask you to make more loaves once they get a single taste of it. It brings back warm memories of old fashioned home cooking and wholesome meals shared around a big family table. Many people also love the fact that they are taking full control over what goes into their food. You no longer have to worry about weird chemical additives or mystery ingredients when you bake your own loaf.
There are so many wonderful reasons to make this bread, whether you are looking at it from an emotional, taste, or fitness point of view. Emotionally, baking this loaf acts as a slow and grounding ritual that helps you unwind from a stressful week. From a taste perspective, store bought bread simply cannot compete with the fresh and rich flavor profile of natural sourdough fermentation. From a fitness and health standpoint, fermented wild yeast bread is far gentler on your digestive system than quick yeast bread. The long fermentation process breaks down gluten and phytic acid, making it much easier for your stomach to process the nutrients. It provides steady energy without causing sharp blood sugar spikes, making it a great option for active lifestyles.
You can bake this loaf whenever you want to upgrade your weekly meal prep or show extra love to your family. It is perfect for lazy Sunday baking sessions when you have a bit of quiet time to spend around the kitchen. You can slice it up for early morning toasts with warm butter, build massive lunch sandwiches for school or work, or serve warm slices alongside a rich bowl of evening soup. Making this recipe becomes a healthy household habit that saves you money while improving your diet. Once you see how proud you feel holding a fresh loaf that you built with your own hands, you will never want to go back to processed grocery store bread again.
Ingredients You Will Need
To make one full size standard loaf of soft sourdough sandwich bread, you will need the following simple ingredients:
- 150 grams active sourdough starter fed and bubbly
- 500 grams unbleached bread flour or high protein all purpose flour
- 250 grams warm water
- 60 grams whole milk room temperature
- 35 grams honey or maple syrup
- 30 grams unsalted butter softened at room temperature
- 10 grams fine sea salt
- 10 grams olive oil for greasing the baking pan
Step by Step Method
Step 1 Activate Your Sourdough Starter
Make sure your sourdough starter is active, healthy, and bubbly before you begin your mix. Feed your starter about four to six hours before you start mixing the dough. Leave it in a warm spot until it doubles or triples in size and looks full of tiny air bubbles. You can test if it is ready by dropping a small spoonful into a cup of room temperature water. If it floats on top of the water, your starter is ready to bake bread.
Step 2 Mix The Wet and Dry Ingredients
In a large mixing bowl, add the warm water, room temperature whole milk, honey, and active sourdough starter. Use a wooden spoon or a whisk to mix everything together until the starter completely dissolves into the liquid. Next, add the unbleached bread flour and fine sea salt into the liquid mixture. Stir with a sturdy spoon until a shaggy dough forms and no dry pockets of flour remain in the bowl.
Step 3 Add Butter and Knead the Dough
Add the softened unsalted butter into the bowl with your shaggy dough. Use your clean hands to knead the butter directly into the dough. Transfer the dough onto a clean surface and knead continuous for about eight to ten minutes. The dough will feel sticky at first, but as you work it, the gluten will develop and it will become smooth, elastic, and soft.
Step 4 First Rise or Bulk Fermentation
Shape the smooth dough into a neat ball and place it into a lightly oiled bowl. Cover the bowl tightly with a clean damp kitchen towel or plastic wrap so the dough does not dry out. Place the bowl in a warm location in your kitchen. Allow the dough to rise for about six to eight hours depending on the room temperature. It should grow by about fifty to seventy percent in size and feel light and puffy when touched gently.
Step 5 Shape the Sandwich Loaf
Gently tip the risen dough out onto a lightly greased surface. Flatten the dough into a rectangular shape with your hands. Fold the left side toward the middle, then fold the right side over it like a letter. Roll the dough up tightly from the top down to form a smooth cylinder shape. Tuck the edges neatly under to create tension on the top skin of the loaf.
Step 6 Second Rise in the Loaf Pan
Grease an eight by four inch loaf pan with olive oil or butter. Carefully lift your shaped dough roll and place it into the pan with the smooth side facing up. Cover the pan loosely with a clean towel. Let it rest in a warm place for two to four hours until the dough rises about one inch above the rim of the pan.
Step 7 Bake the Loaf
Preheat your oven to three hundred and seventy five degrees Fahrenheit or one hundred and ninety degrees Celsius. Brush the top of your risen loaf with a small amount of melted butter or milk for a shiny top crust. Place the loaf pan onto the middle rack of your oven. Bake for thirty five to forty minutes until the top is deep golden brown and the loaf sounds hollow when tapped gently on top.
Step 8 Cool Completely Before Slicing
Remove the pan from the oven carefully using oven mitts. Let the loaf rest inside the pan for ten minutes, then turn it out onto a wire cooling rack. Allow the bread to cool completely for at least two hours before slicing into it with a serrated knife. Slicing too early while it is hot can make the inside gummy, so patience is key.
Why This Recipe Is Special
This sourdough sandwich bread recipe stands out because it combines traditional baking art with practical daily needs. Most traditional sourdough recipes produce loaves with large holes that make spreads fall through easily, but this recipe creates a uniform crumb structure. It stays soft for days without adding artificial preservatives, mold inhibitors, or processed sugars found in commercial bread.
From a health standpoint, this bread is a true superstar. The natural sourdough bacteria break down the phytic acid present in wheat grains during the long fermentation period. Phytic acid usually blocks your body from absorbing important minerals like zinc, magnesium, and iron. By neutralizing it, your body can absorb much more nutrition from every single bite. The wild yeast process also lowers the glycemic index of the bread, which helps prevent blood sugar spikes after meals.
In terms of taste, this loaf offers a delicate balance that appeals to everyone. It has a light buttermilk like tang that elevates simple sandwiches without overpowering the toppings. The addition of milk, honey, and butter gives the crust a tender chew and keeps the interior slice incredibly pillow soft for your favorite meals.
Extra Tips for Better Taste
- Use rich whole milk instead of skim milk to give the crumb a softer and more velvety texture.
- Substitute honey with real maple syrup or brown sugar for a subtle variation in sweet undertones.
- Brush the top of the loaf with melted garlic butter right after taking it out of the oven for an amazing aromatic crust.
- Sprinkle sesame seeds, poppy seeds, or rolled oats on top of the dough before baking to add a nice crunch and earthy flavor.
- Toast your slices in a skillet with a small touch of coconut oil or butter to bring out deep nutlike aromas in the grain.
Final Thoughts
Baking your own sourdough sandwich bread is a wonderful habit that brings pure flavor and better health straight into your kitchen. It turns basic daily ingredients into something truly special that you can feel proud to feed your loved ones. Once you get the simple rhythm down, this recipe will quickly become a favorite part of your weekly routine. Enjoy every slice toasted, stacked, or straight from the cutting board with fresh butter.
Nutrition Details
Here is the estimated nutrition information for the full recipe and broken down per serving, assuming the loaf is sliced into twelve equal pieces.
Recipe Totals and Per Serving Breakdown
| Nutritional Component | Total Recipe Amount | Per Serving Amount (1 Slice) |
| Calories | 2150 kcal | 179 kcal |
| Carbohydrates | 410 g | 34.1 g |
| Dietary Fiber | 16 g | 1.3 g |
| Sugars | 32 g | 2.6 g |
| Protein | 62 g | 5.1 g |
| Total Fat | 31 g | 2.5 g |
| Saturated Fat | 17 g | 1.4 g |
| Sodium | 3900 mg | 325 mg |
| Potassium | 650 mg | 54 mg |
Disclaimer
Every human body functions differently and individual nutrition needs will vary based on age, metabolism, physical activity levels, and overall health status. The nutritional values listed above are estimations calculated using standard ingredients and may change based on specific brands or substitutions used. If you have severe gluten sensitivities, celiac disease, or specific dietary restrictions, please speak with a qualified health professional or dietitian before introducing sourdough products into your diet.