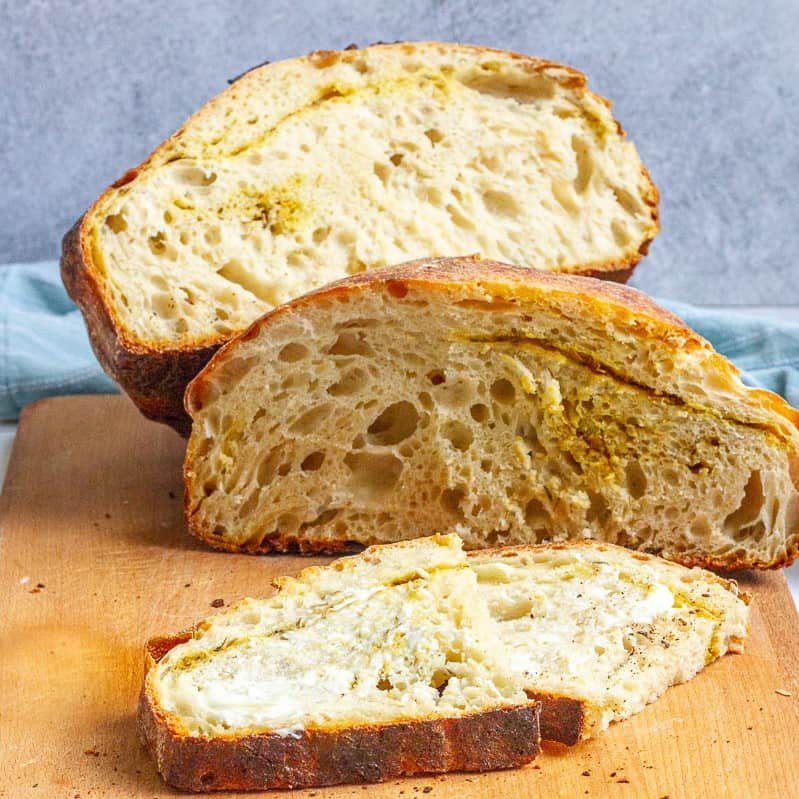
Garlic herb sourdough bread is one of the most comforting and flavorful recipes you can ever make in your home kitchen. This recipe combines the natural tang of classic sourdough with the rich taste of roasted garlic and fragrant herbs. When you bake this loaf, your whole house fills with a warm cozy aroma that makes everyone hungry. The outer crust turns out delightfully crispy while the inside stays soft light and chewy. It is a wonderful blend of traditional artisan baking techniques and everyday home cooking comfort. Making this loaf allows you to turn basic kitchen staples into something truly extraordinary. You do not need to be a professional baker to get amazing results with this simple recipe. Every bite gives you a lovely crunch followed by a burst of savory garlic and herbal goodness.
People absolutely love this bread because it offers a delicious twist on standard sourdough. Plain sourdough is great on its own, but adding savory ingredients like garlic, rosemary, and thyme takes it to a whole new level. The deep warm flavors create a rich taste profile that pairs well with almost any meal you serve. It brings a cozy bakery experience right into your dining room without needing expensive ingredients. Friends and family always get excited when they see a fresh loaf sitting on the cutting board. It feels like a special treat that required hours of effort, even though the hands on work is quite manageable. The golden crust combined with the rich aroma makes it an instant favorite at any gathering. It is the kind of comfort food that brings genuine smiles around the dinner table.
There are so many wonderful reasons and moments to bake this amazing loaf for your loved ones. You might want to make it on a quiet weekend when you want to relax and enjoy the process of slow baking. The peaceful act of mixing dough and watching it rise can bring a sense of calm after a busy week. Taste wise, it is the ultimate side dish for warm soups, pasta dishes, or fresh garden salads. If you are mindful of fitness, traditional fermented sourdough is often easier on the stomach than fast baked white bread. The long fermentation process breaks down complex starches, making it a great option for better digestion. It gives you long lasting energy without feeling overly heavy or inflated. Whether you bake for health benefits or pure culinary delight, this loaf hits the mark every time.
Starting your journey into sourdough baking with a garlic and herb loaf is deeply satisfying. Baking bread at home gives you full control over every single ingredient that goes into your body. You will not find any artificial preservatives, strange additives, or unnecessary chemicals in this wholesome loaf. Instead, you get real flour, clean water, fresh garlic, natural herbs, and a touch of sea salt. Sharing a loaf of homemade bread with neighbors or family creates a warm human connection that store bought items cannot match. The process teaches you patience and gives you a wonderful sense of pride when you pull a golden brown loaf from the hot oven. It quickly becomes a favorite routine that you look forward to repeating every week. Enjoying a warm slice slathered with fresh butter is one of the simple joys of life.
Ingredients You Will Need
To make this delicious loaf, you will need the following simple ingredients measured accurately for the best results:
- 500 grams of active and bubbly sourdough starter feed recently
- 500 grams of unbleached bread flour for good structure
- 350 grams of warm filtered water
- 10 grams of fine sea salt or kosher salt
- 1 full bulb of fresh garlic
- 1 tablespoon of extra virgin olive oil for roasting garlic
- 1 tablespoon of fresh rosemary finely chopped
- 1 tablespoon of fresh thyme leaves finely chopped
- 1 teaspoon of dried oregano for extra savory aroma
- 2 tablespoons of soft unsalted butter optional for brushing the crust
Step by Step Method
Step 1: Prepare the Garlic and Herbs
First, you want to roast your garlic so it becomes soft, sweet, and mellow. Preheat your oven to 200 degrees Celsius or 400 degrees Fahrenheit. Cut the top off the garlic bulb so the tops of the cloves are exposed. Drizzle the olive oil over the exposed cloves and wrap the whole head tightly in aluminum foil. Place it in the oven and roast for about 40 minutes until the garlic is completely soft and golden brown. Once it cools down, squeeze the soft roasted garlic cloves out of their skin into a small bowl and mash them gently with a fork. Mix in your finely chopped rosemary, thyme, and dried oregano. Set this aromatic mixture aside so it is ready when you need to fold it into your dough.
Step 2: Mix the Wet and Dry Ingredients
In a large glass or ceramic mixing bowl, combine the warm filtered water and your active sourdough starter. Stir them together using a whisk or a wooden spoon until the starter is completely dissolved and the water looks milky. Add all of the bread flour to the bowl. Use your hands or a sturdy spatula to mix everything together until all the dry flour disappears. At this stage, the mixture will look like a shaggy rough ball of dough. Cover the bowl with a clean damp kitchen towel or plastic wrap. Let it rest for 30 to 45 minutes at room temperature. This resting step is called autolyse, and it helps the flour absorb the water fully, making the dough much easier to handle later.
Step 3: Add the Salt and Knead
After the resting period, sprinkle the fine sea salt evenly over the top of the dough. Wet your hands with a little bit of cool water so the dough does not stick to your fingers. Begin working the salt into the dough by gently pinching and folding the dough over itself. Stretch the edges up and fold them into the center repeatedly for about three to five minutes. You will feel the dough become smoother and more elastic as you work. Once the salt is fully incorporated, cover the bowl again and let it rest for another 30 minutes in a warm spot in your kitchen.
Step 4: Perform Stretch and Folds with Garlic
Now it is time to build strength in your dough and add the delicious flavor ingredients. Instead of traditional heavy kneading, sourdough uses a gentle stretch and fold method. Wet your hands again, reach down to the bottom of the bowl, grab one side of the dough, stretch it upwards gently, and fold it over the top toward the opposite side. Rotate the bowl ninety degrees and repeat this process. Do this four times until you have stretched all four sides. On the second round of stretch and folds, spread half of your roasted garlic and herb mixture over the surface of the dough. Fold the dough over the garlic to trap it inside. Perform two more rounds of stretch and folds every 30 minutes, adding the remaining garlic mixture during the third round so it spreads evenly throughout the loaf.
Step 5: Bulk Fermentation
Cover the bowl tightly with a cloth or wrap and let the dough rise at room temperature. This phase is called bulk fermentation. Depending on how warm your kitchen is, this process can take anywhere from four to seven hours. You will know the dough is ready when it has increased in size by about fifty percent, feels airy and puffy, and shows nice little air bubbles on top and around the sides. Do not rush this stage because proper fermentation gives sourdough its classic flavor, lovely texture, and easy digestibility.
Step 6: Shape the Dough
Lightly dust your work surface with a small amount of bread flour. Gently tip the puffy dough out of the bowl onto the surface. Avoid pressing out all the air bubbles that have formed inside. Gently stretch the dough into a rough square shape. Fold the left side into the middle, then fold the right side over it like a letter. Roll the dough up tightly from the top down into a neat round ball shape. Place your hands behind the dough ball and pull it toward you across the counter to build tension on the outer skin. Repeat this pulling motion a few times until the surface looks smooth and tight. Let it rest on the counter for 15 minutes.
Step 7: Final Proof in the Basket
Dust a bread proofing basket or a round bowl lined with a clean cotton towel using rice flour or bread flour. Rice flour works best because it prevents the wet dough from sticking to the fabric. Lift your shaped dough ball gently using a bench scraper or your hands and place it upside down into the prepared basket, so the smooth top is touching the bottom of the basket. Stitch the bottom edges together lightly if needed. Cover the basket and place it in the refrigerator for a cold final proof lasting anywhere from 8 to 18 hours. This cold step slows down fermentation, develops a deeper flavor, and makes the dough firmer so it holds its shape when baked.
Step 8: Bake the Loaf
Place a heavy cast iron Dutch oven with its lid on into your oven. Preheat the oven to 230 degrees Celsius or 450 degrees Fahrenheit for at least 45 minutes so the pot becomes extremely hot. Take your dough straight out of the refrigerator. Invert the dough onto a piece of parchment paper so the smooth side is now facing up. Dust the top lightly with flour. Use a sharp razor blade or kitchen score tool to make a clean angled cut across the top of the dough. Carefully remove the hot pot from the oven, lower the dough using the parchment paper into the pot, and put the lid back on. Bake with the lid on for 20 minutes to trap steam, which helps the bread rise high. Then remove the lid and bake for another 20 to 25 minutes until the crust turns a rich deep golden brown color.
Step 9: Cool down completely
Carefully remove the baked loaf from the hot pot and place it on a wire cooling rack. If you like, brush the top crust with melted butter while it is still hot for extra softness and shine. Let the bread cool completely for at least two hours before cutting into it. Slicing warm bread causes the moisture inside to escape as steam, which can make the texture gummy. Waiting until it cools ensures a perfectly soft and fluffy interior.
Why This Recipe Is Special
This garlic herb sourdough bread stands out because it balances amazing flavor with natural health benefits. Traditional sourdough uses wild yeast and natural bacteria to raise the dough rather than commercial yeast packets. This slow natural fermentation breaks down phytic acid and gluten proteins, making the nutrients easier for your body to absorb. Many people who feel uncomfortable after eating fast processed white bread find that sourdough is gentle on their stomach and much easier to digest.
The inclusion of fresh roasted garlic adds natural compound nutrients known to support overall wellness. Garlic has been valued for generations for its warm aroma and positive qualities. When you roast garlic, its harsh pungency transforms into a gentle sweet creaminess that blends smoothly with the dough. The fresh herbs like rosemary and thyme contribute natural antioxidants and essential oils that brighten up every bite. Together, these elements turn a standard loaf into a nourishing and wholesome food item you can feel proud to share with your family.
The texture and taste combination is another reason why this loaf is so exceptional. The natural steam created inside a sealed hot pot during baking gives you an authentic bakery style crust that crackles as it cools. Inside, the crumb is light, open, and pillow soft. The sour notes from the long fermentation process blend seamlessly with the sweet roasted garlic and earthly garden herbs. It tastes like high end artisan bread from an expensive French bakery, yet you created it in your own kitchen with simple affordable ingredients.
Extra Tips for Better Taste
- Use Roasted Garlic Instead of Raw Garlic: Always roast your garlic before mixing it into the dough. Raw garlic can inhibit yeast growth and create a harsh bitingly strong taste that overpowers the loaf. Roasted garlic brings out a sweet subtle flavor that mixes smoothly into the crumb.
- Incorporate Fresh Herbs: Fresh herbs provide far better flavor and visual appeal than dried herbs alone. Chop your fresh rosemary and thyme finely so they distribute evenly without creating tough bite sized pieces.
- Try Rice Flour for Dusting: Dusting your towel or proofing basket with rice flour prevents sticky dough from adhering to the fabric. Rice flour does not contain gluten, so it will not absorb moisture or glue the dough to the cloth.
- Add Shredded Cheese for Variation: If you want an even richer loaf, add half a cup of shredded sharp cheddar or parmesan cheese alongside the garlic and herb mixture during the stretch and fold step.
- Control Your Kitchen Temperature: Sourdough thrives best in warm environments between 24 and 26 degrees Celsius or 75 and 78 degrees Fahrenheit. If your kitchen is cool, let your dough rise inside an oven with just the interior light turned on.
- Spray Water for Extra Steam: If you want an extra crispy crust with tiny delicate blisters, spray a small mist of water inside your hot pot right before closing the lid and baking.
Final Thoughts
Baking your own garlic herb sourdough bread is a deeply fulfilling experience that rewards your time and care with unforgettable flavor. From watching the dough rise to breathing in the irresistible scent of garlic and herbs baking in the oven, every part of the process brings warmth to your home. It proves that simple ingredients like flour, water, salt, and herbs can turn into something truly extraordinary through natural slow fermentation. Slice it thick, toast it lightly, and enjoy it with fresh butter or alongside your favorite homemade meals. Happy baking to everyone starting their journey into artisan bread making!
Nutrition Details
Here is an estimated nutritional breakdown for this sourdough loaf recipe. Values are calculated per single serving assuming the loaf is divided into 10 equal slices.
General Recipe Totals
| Item | Total Recipe Amount | Per Serving (1 Slice) |
| Total Servings | 10 Slices | 1 Slice |
| Calories | 1950 kcal | 195 kcal |
| Carbohydrates | 380 grams | 38 grams |
| Protein | 60 grams | 6 grams |
| Fat | 18 grams | 1.8 grams |
| Dietary Fiber | 20 grams | 2 grams |
| Sodium | 3900 milligrams | 390 milligrams |
| Sugar | 5 grams | 0.5 grams |
Detailed Breakdown Per Serving
- Calories: 195 kcal
- Carbohydrates: 38 grams
- Protein: 6 grams
- Total Fat: 1.8 grams
- Saturated Fat: 0.3 grams
- Dietary Fiber: 2 grams
- Sugars: 0.5 grams
- Sodium: 390 milligrams
- Potassium: 85 milligrams
- Calcium: 18 milligrams
- Iron: 2.2 milligrams
Disclaimer
This recipe and the nutritional information provided are intended for general educational and informational purposes only. Every person has a unique body, metabolism, dietary requirement, and level of physical activity. Nutritional values can vary based on the specific brand of ingredients used, exact measurements, and individual baking results. If you have specific health conditions, gluten sensitivity, or dietary restrictions, please consult a qualified healthcare professional or certified dietitian for personalized advice before making significant changes to your diet.